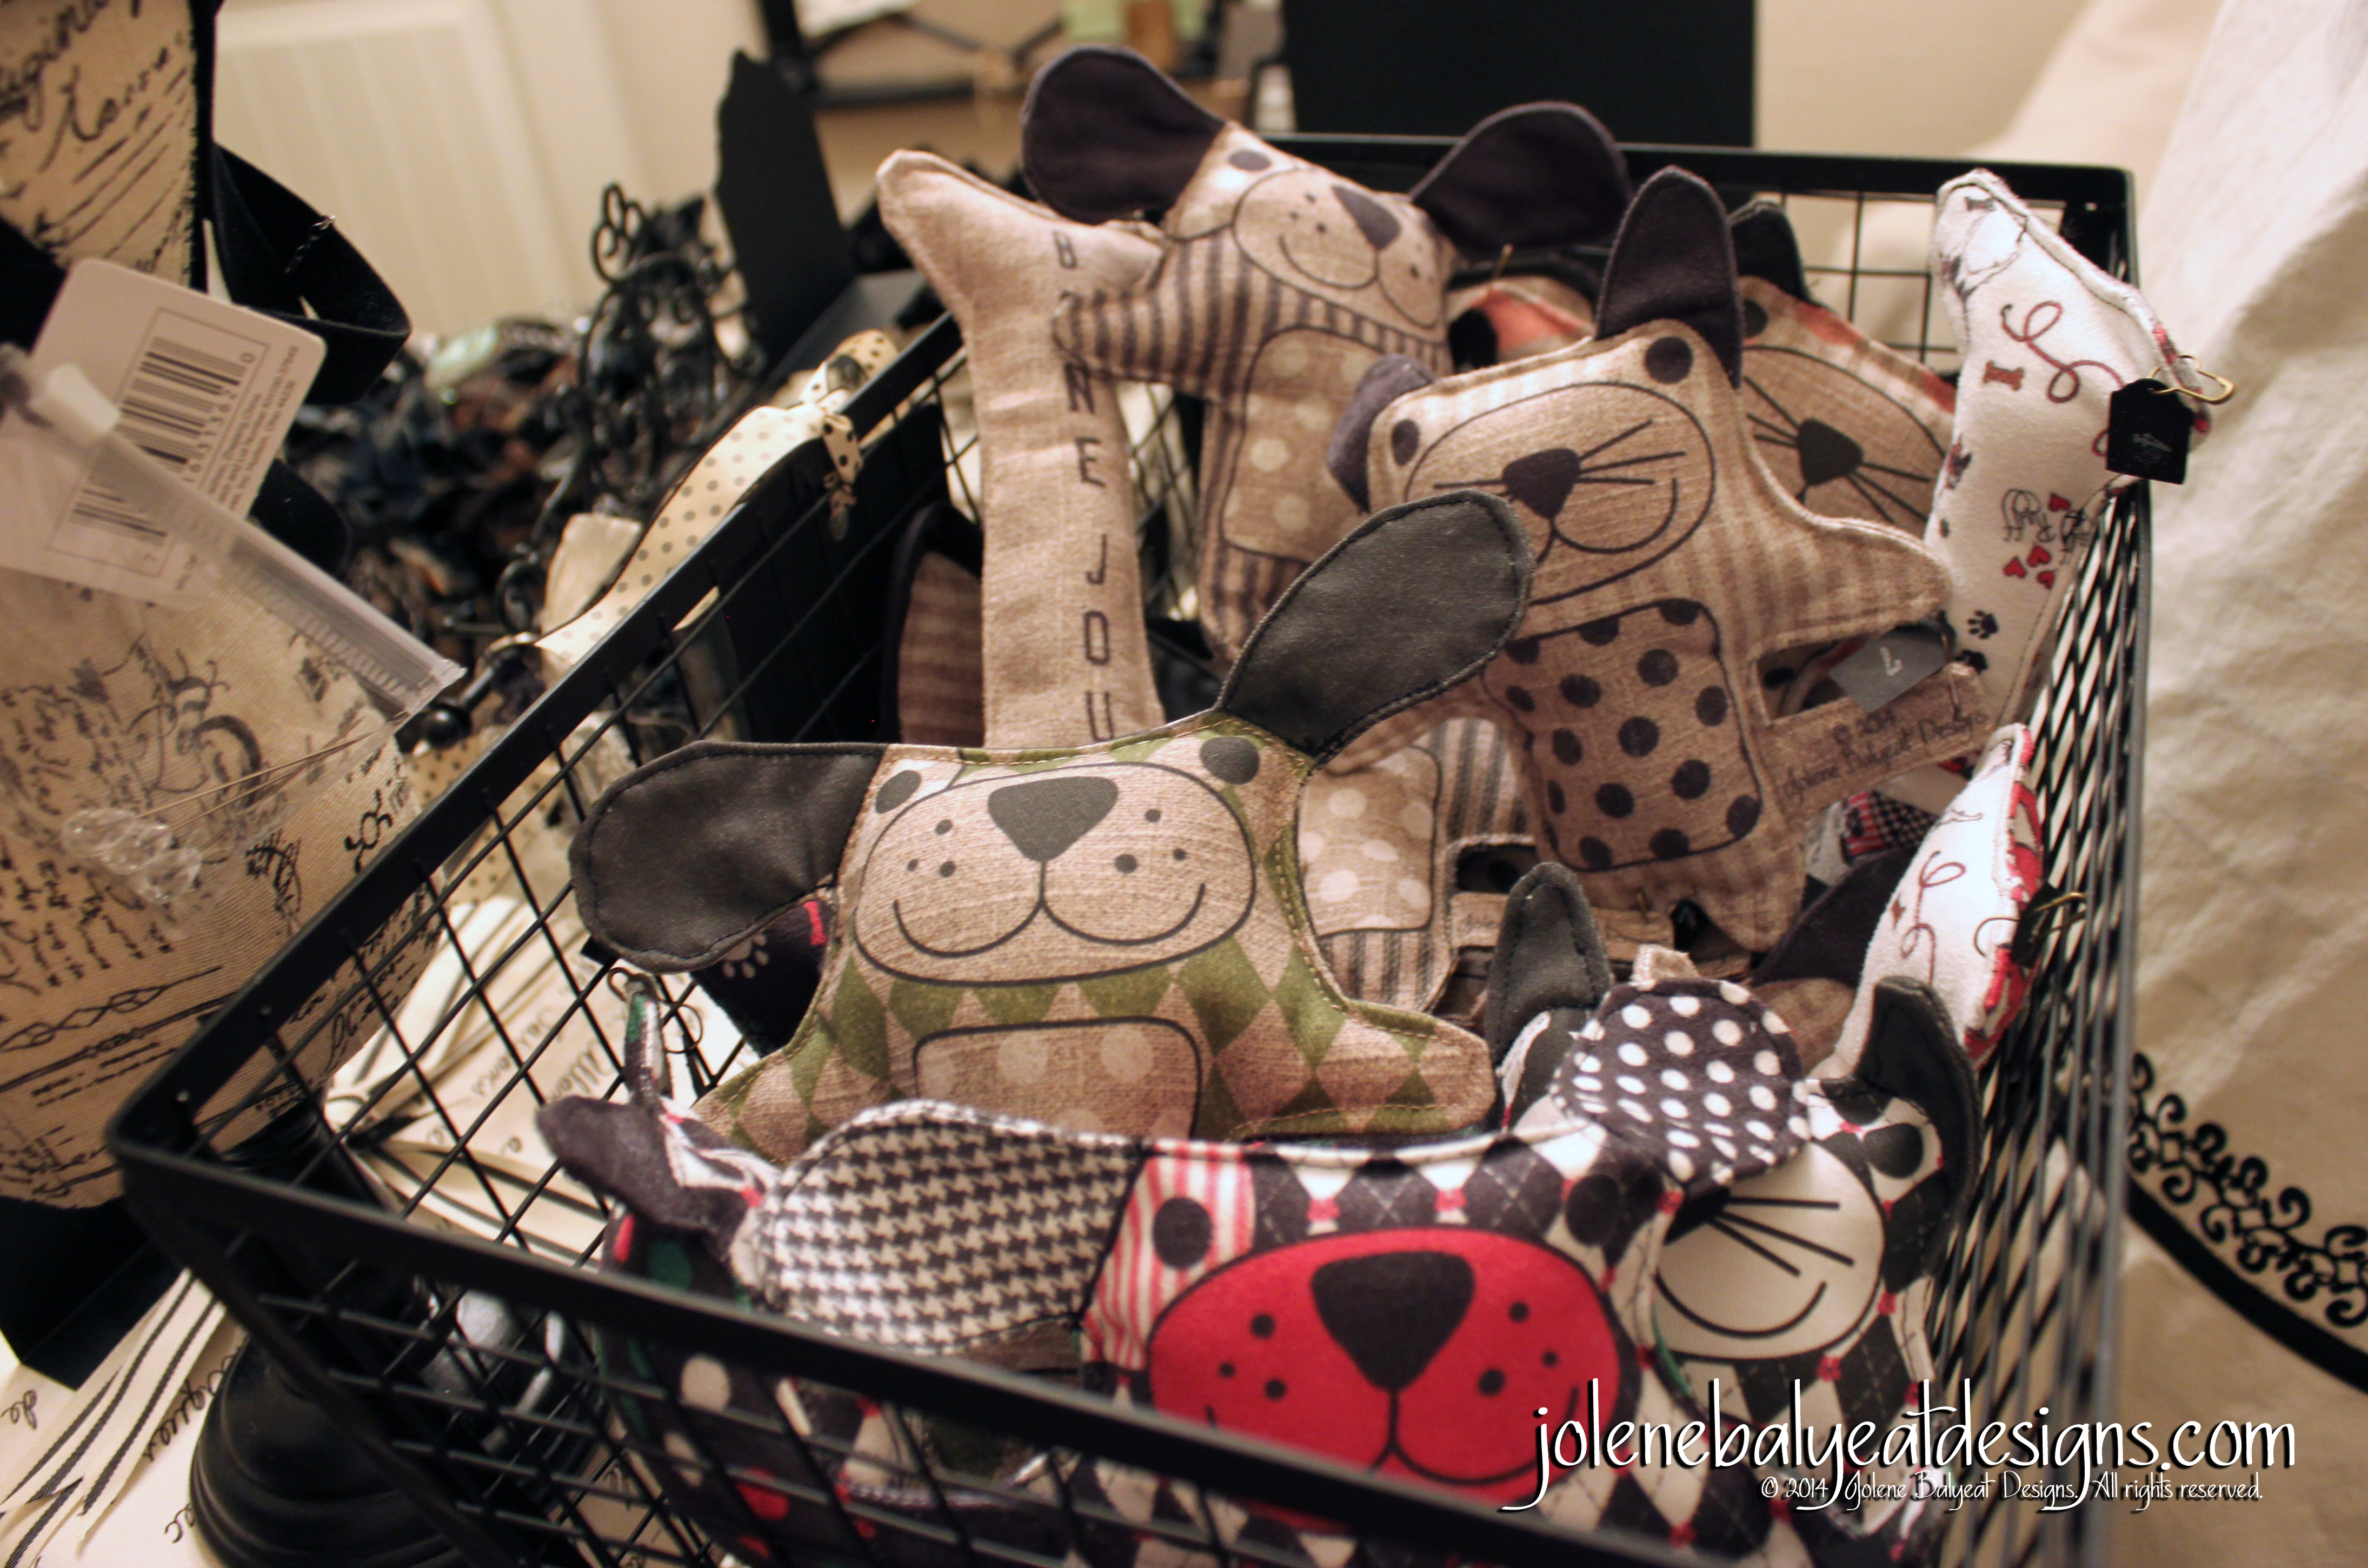
 This is Bailey’s favorite toy. She love’s them. I mean she absolutely loves them! And because they bring her so much joy, they just might delight a little creature you know. Therefore, I have to share. I used the word creature because although I designed these with a puppy in mind, I have had multiple people say that a baby would love them too. There are 3 bone plushies as well as a kitty and puppy plushy on each fat quarter of fabric. Insert disclaimer here…Hopefully it is obvious that I wouldn’t be suggesting someone should give their kid a bone but one never knows who might read this in bloggy land…Animals for the kiddo and bones for the pets…capisce? But really it doesn’t matter…I know some of your senses of humor…you are going to let your kids have the bone. Disclaimer part 2…Some dogs literally EAT squeak toys. These doggies must be supervised so that they don’t choke if you put a squeaker inside the plushy. My doggie prefers to fetch with hers, snuggle it, and race around the house with it in her mouth, holding it by its tag.
“How does one make one of these beauties,” you ask? Why, I am delighted you asked, inquisitive reader…continue reading for the complete tutorial below!
Supplies needed to complete this project:
- Fat Quarter of Boutique Squeak fabric design of your choice
- Sewing Machine
- Squeakers
- Stuffing (method A) or Quilt Batting (method B)
- 1/2 inch double fold bias tape (if you choose method B)
- Thread
- Scissors
There are four different Cut and Sew panels to choose from.
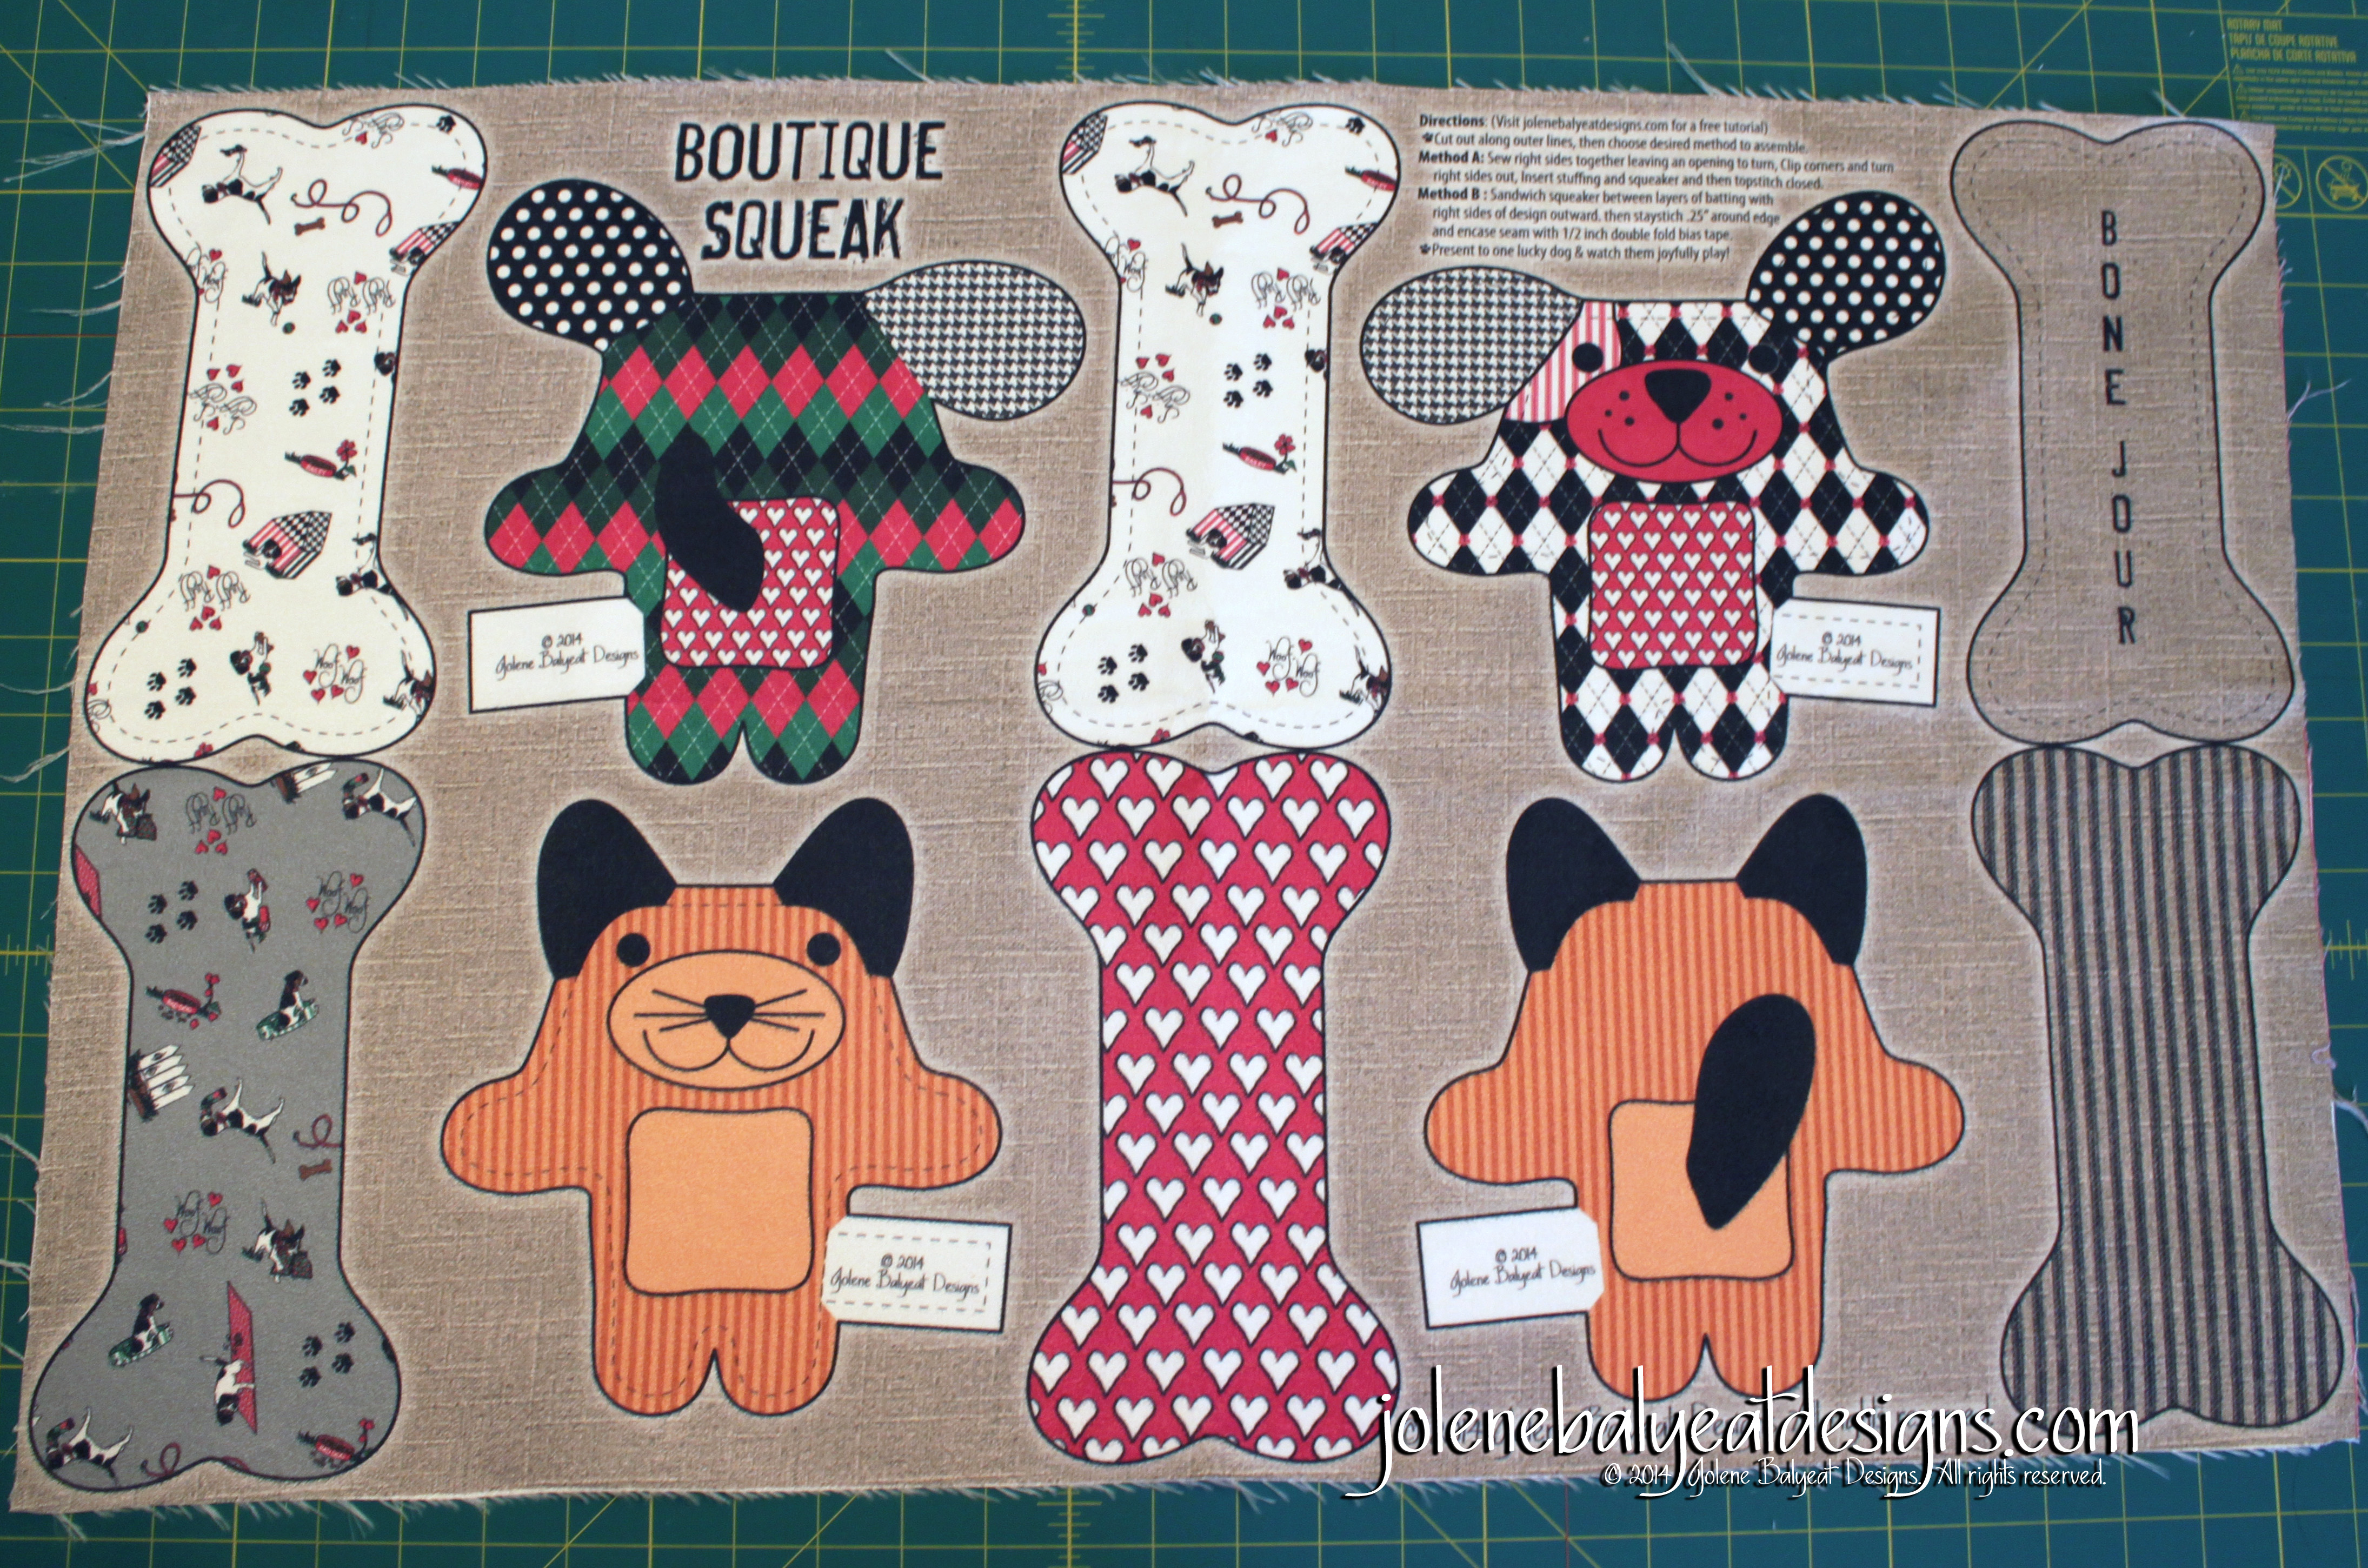
Boutique Squeak Blaze’s Favorite (pictured above)
Boutique Squeak Good Dog Bad Dog
Boutique Squeak Linen Looks
Boutique Squeak Painted Linen
Boutique Squeak Sampler (All 4 of the above sized to fit on one yard)
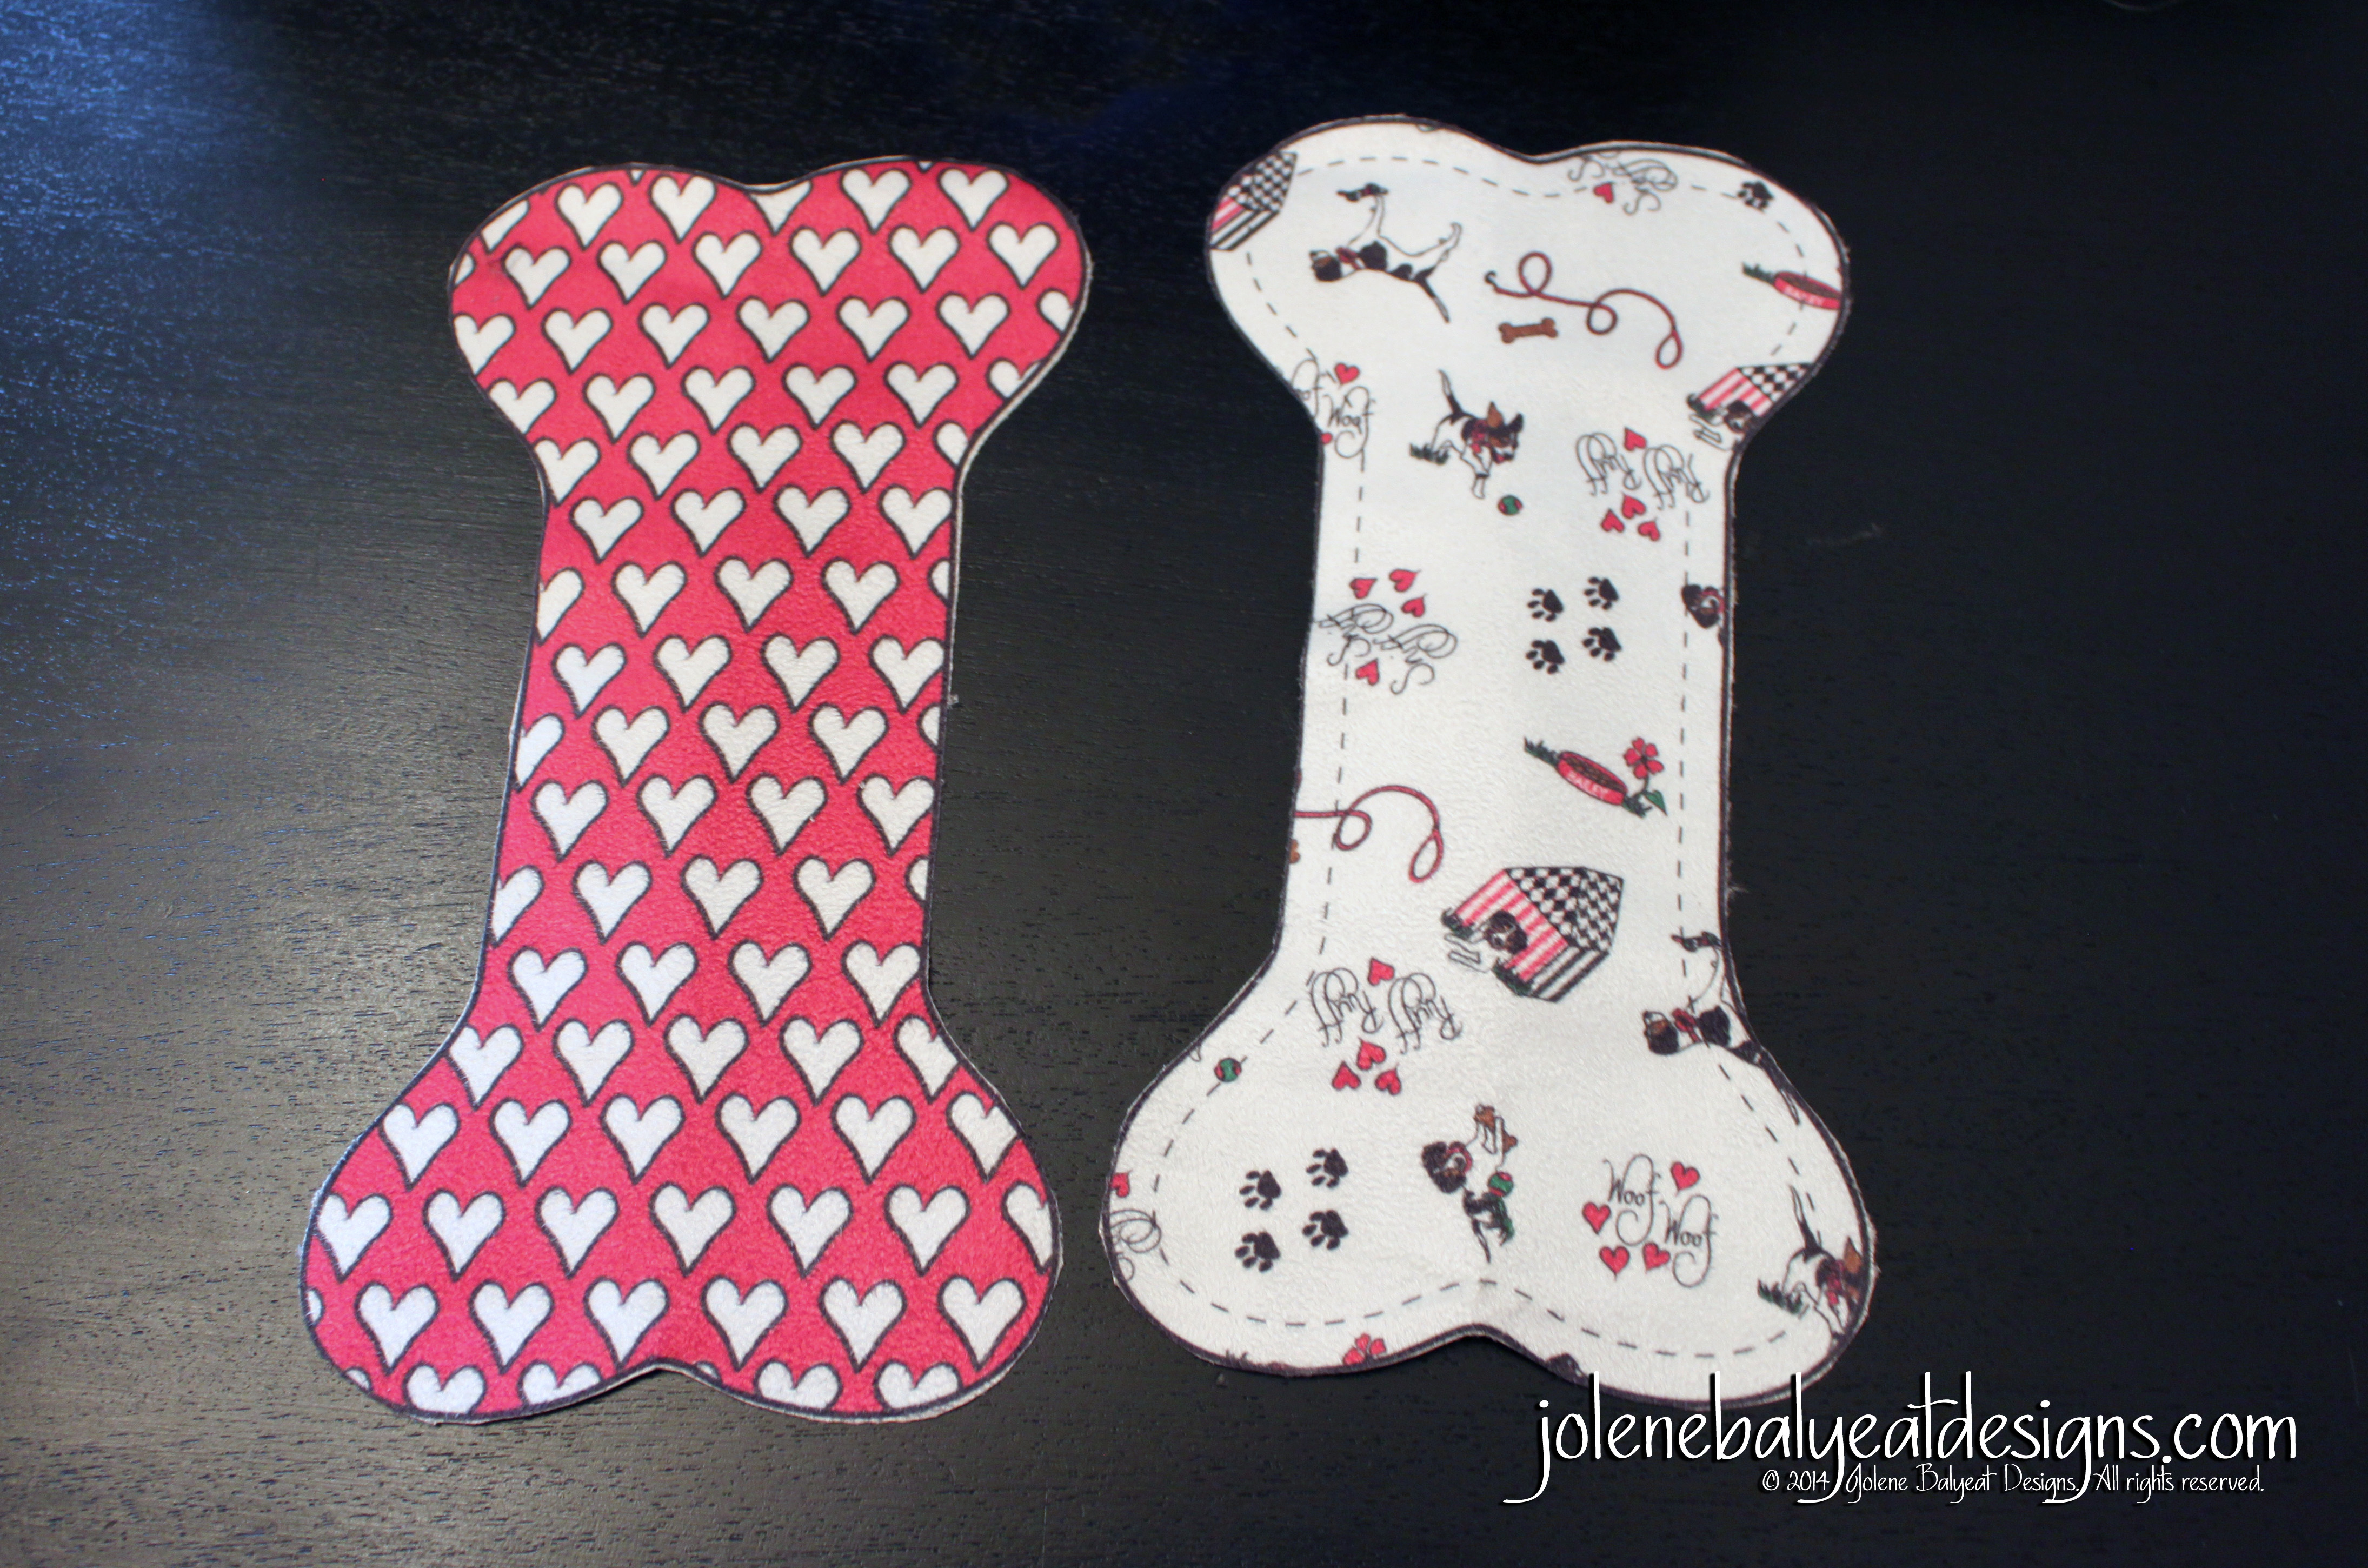
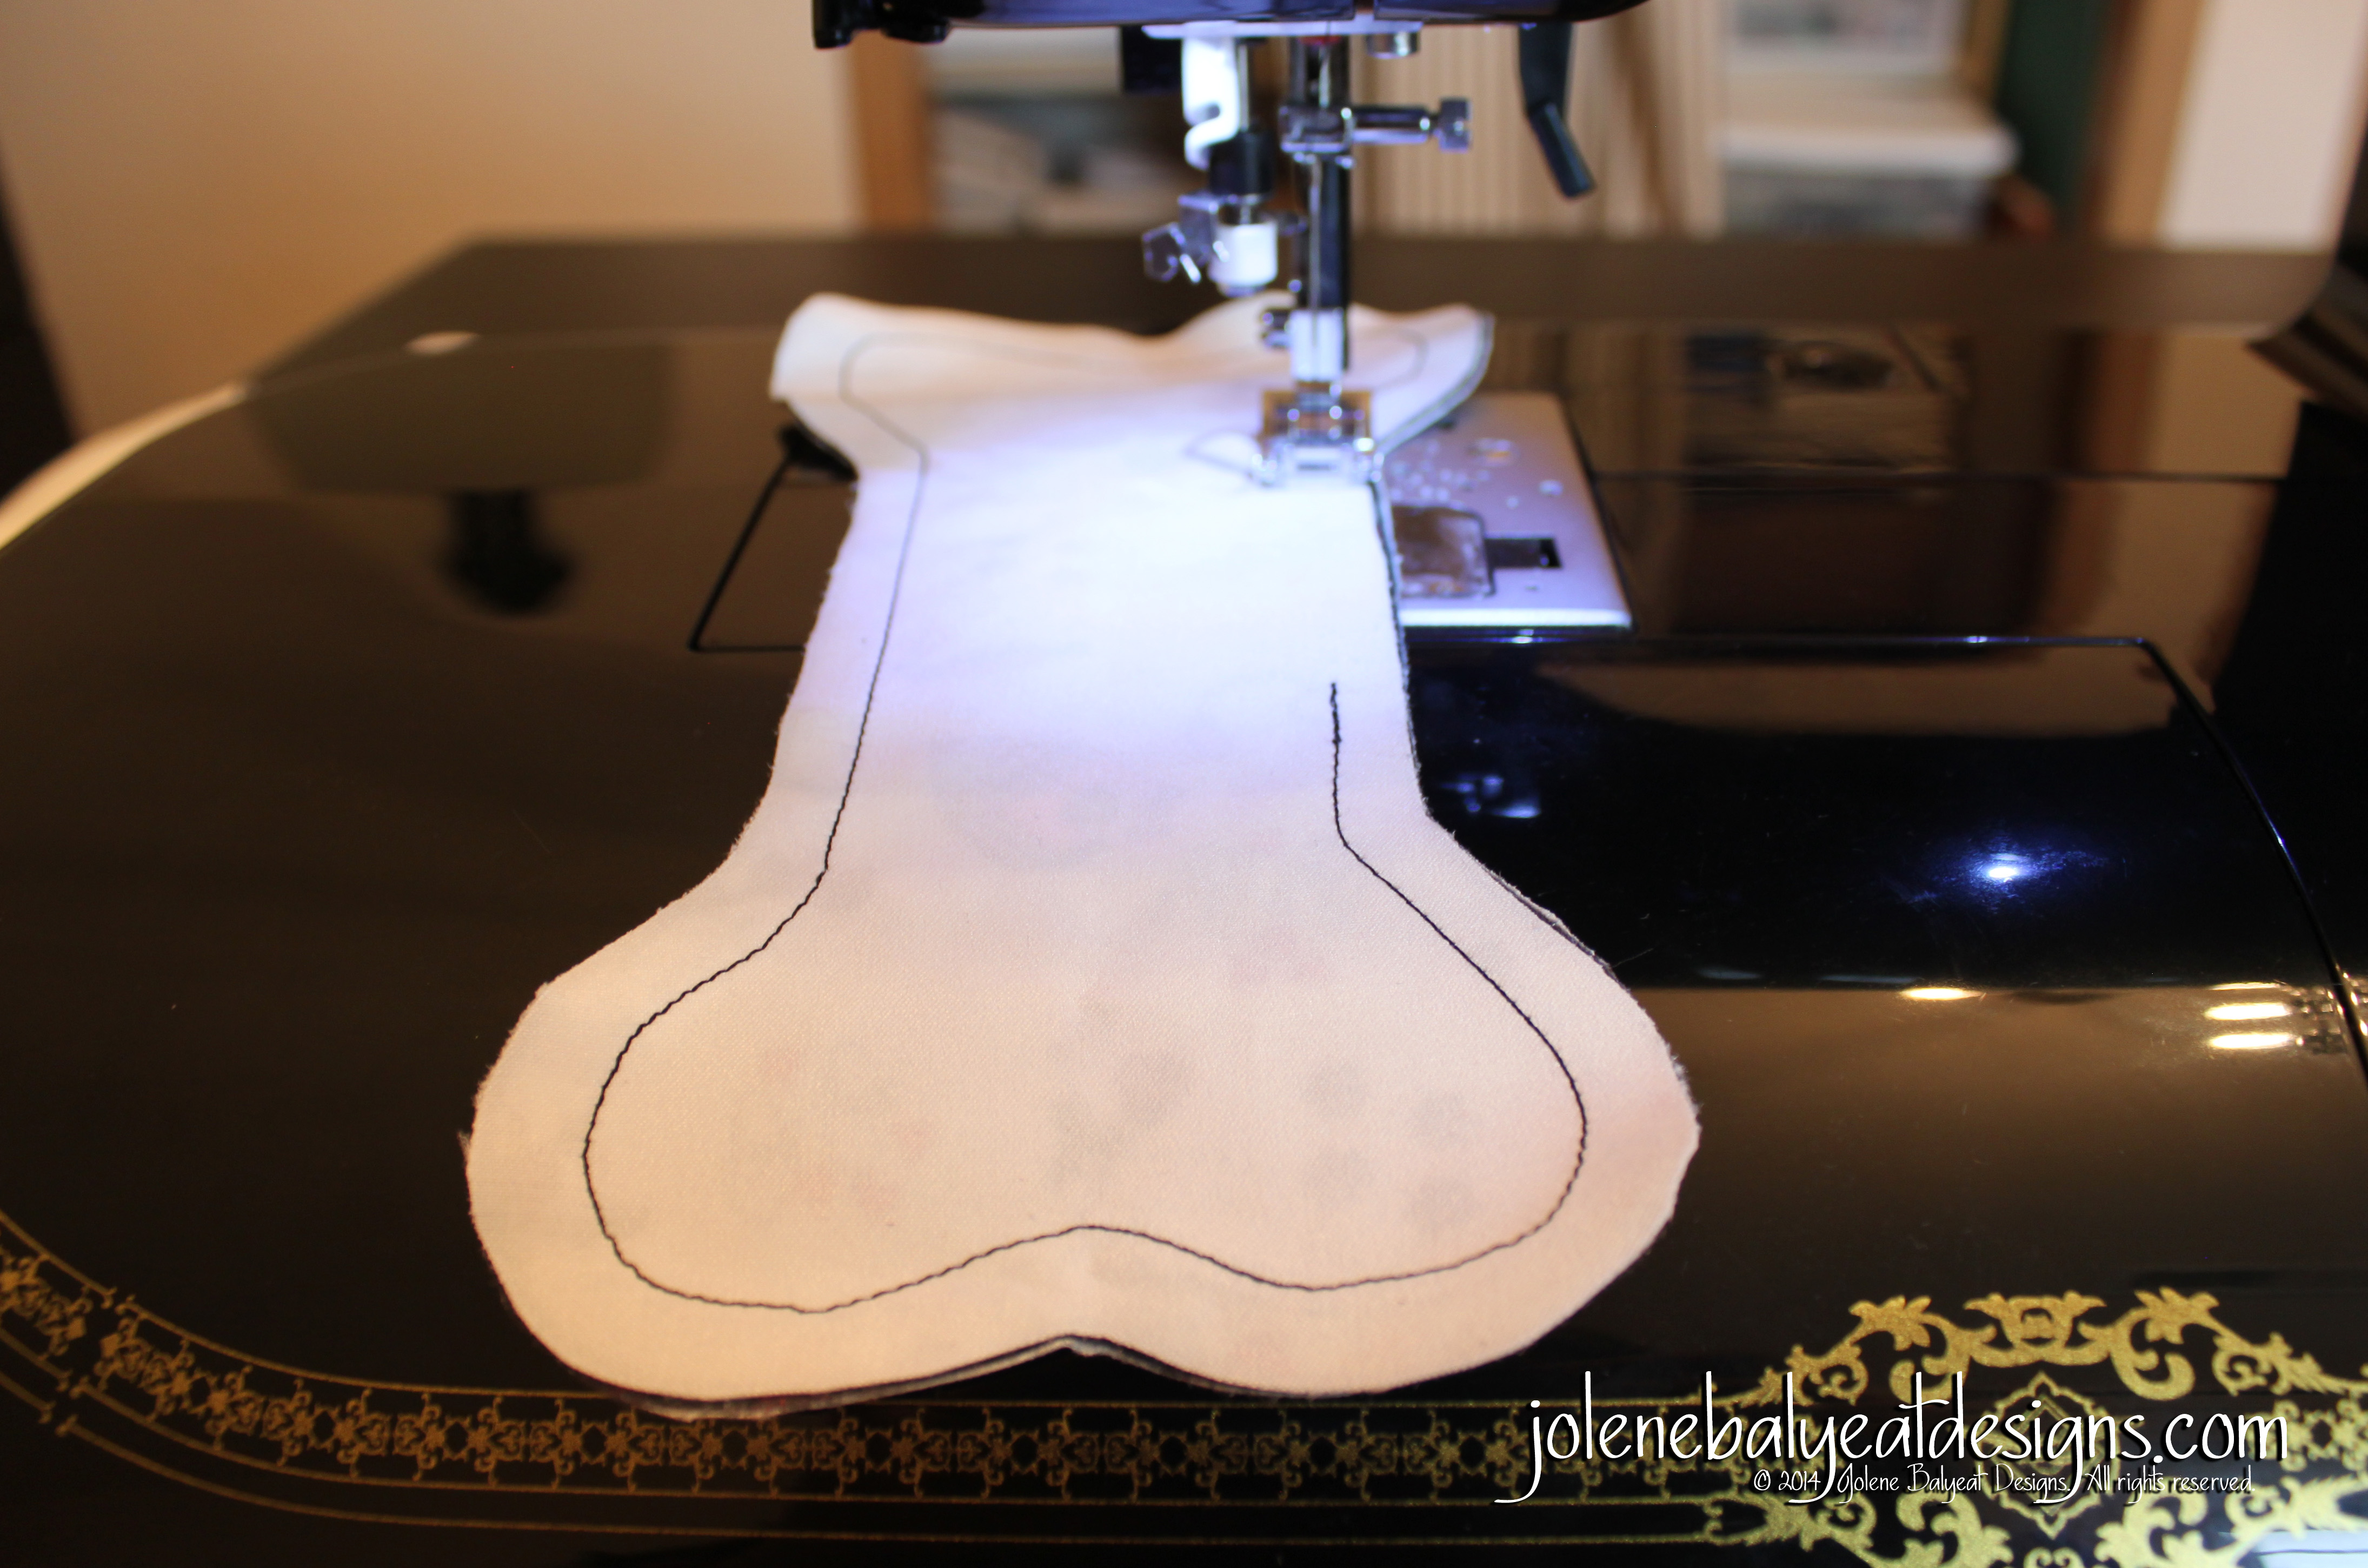
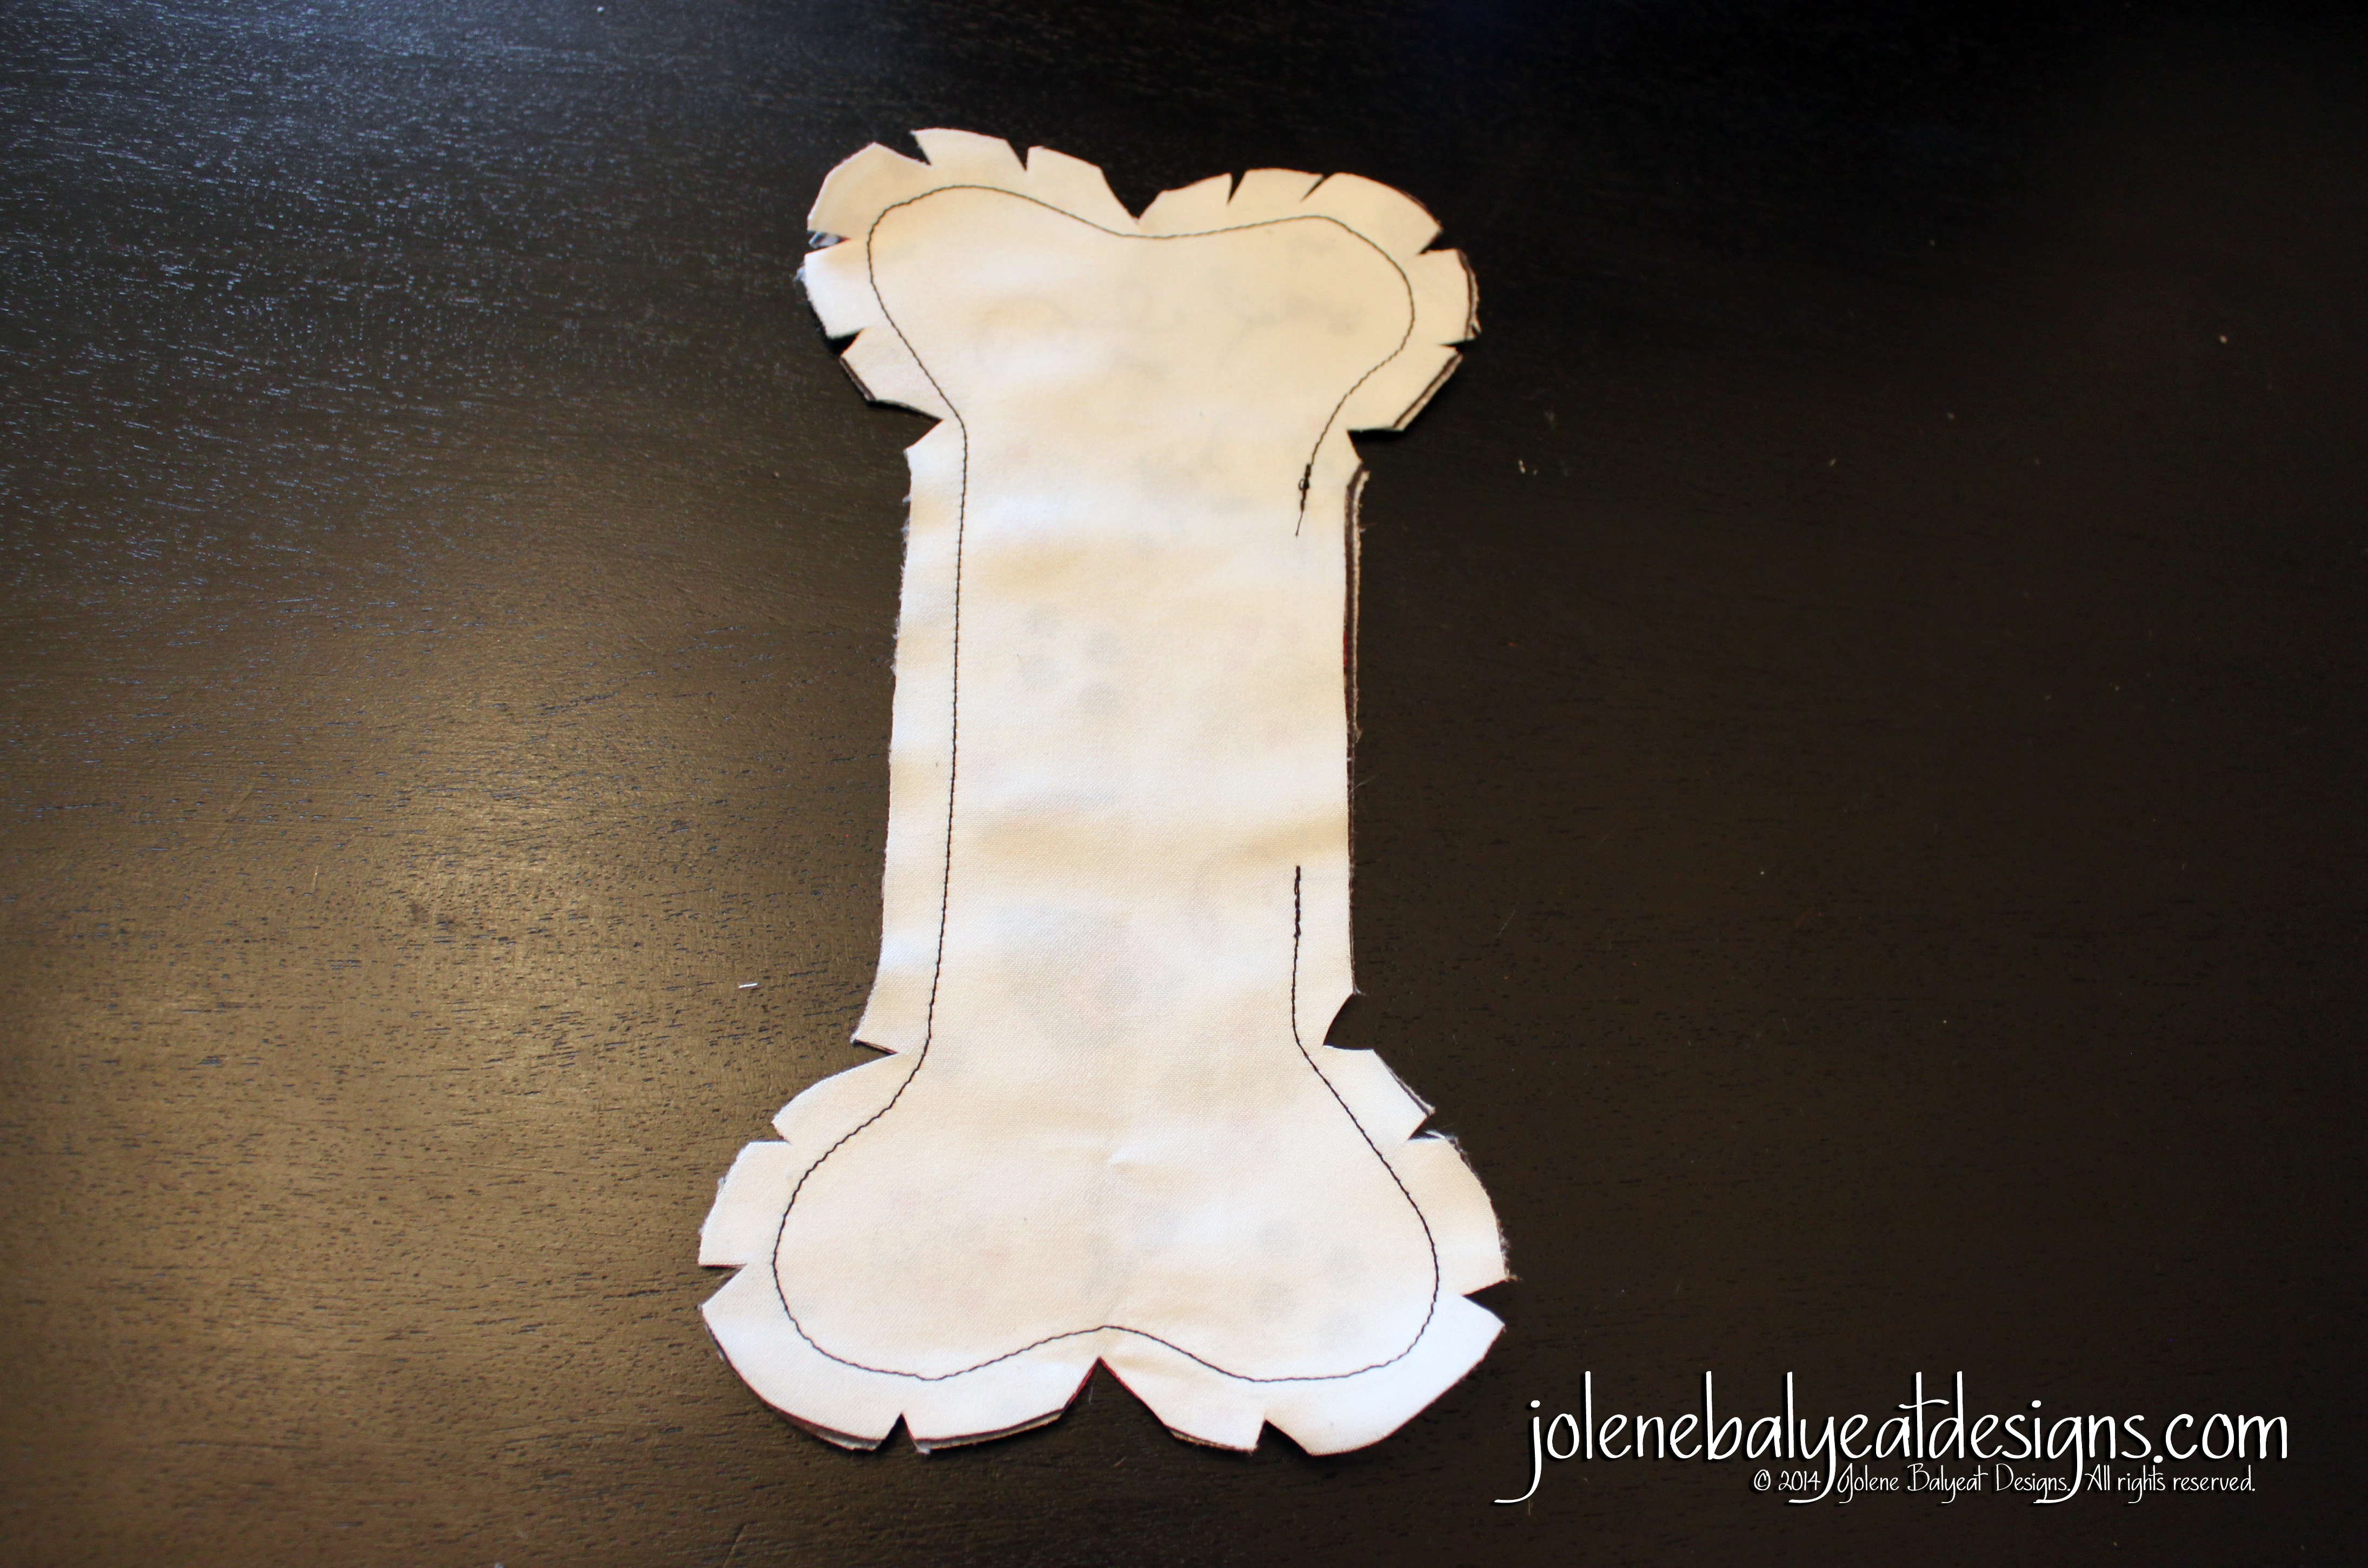
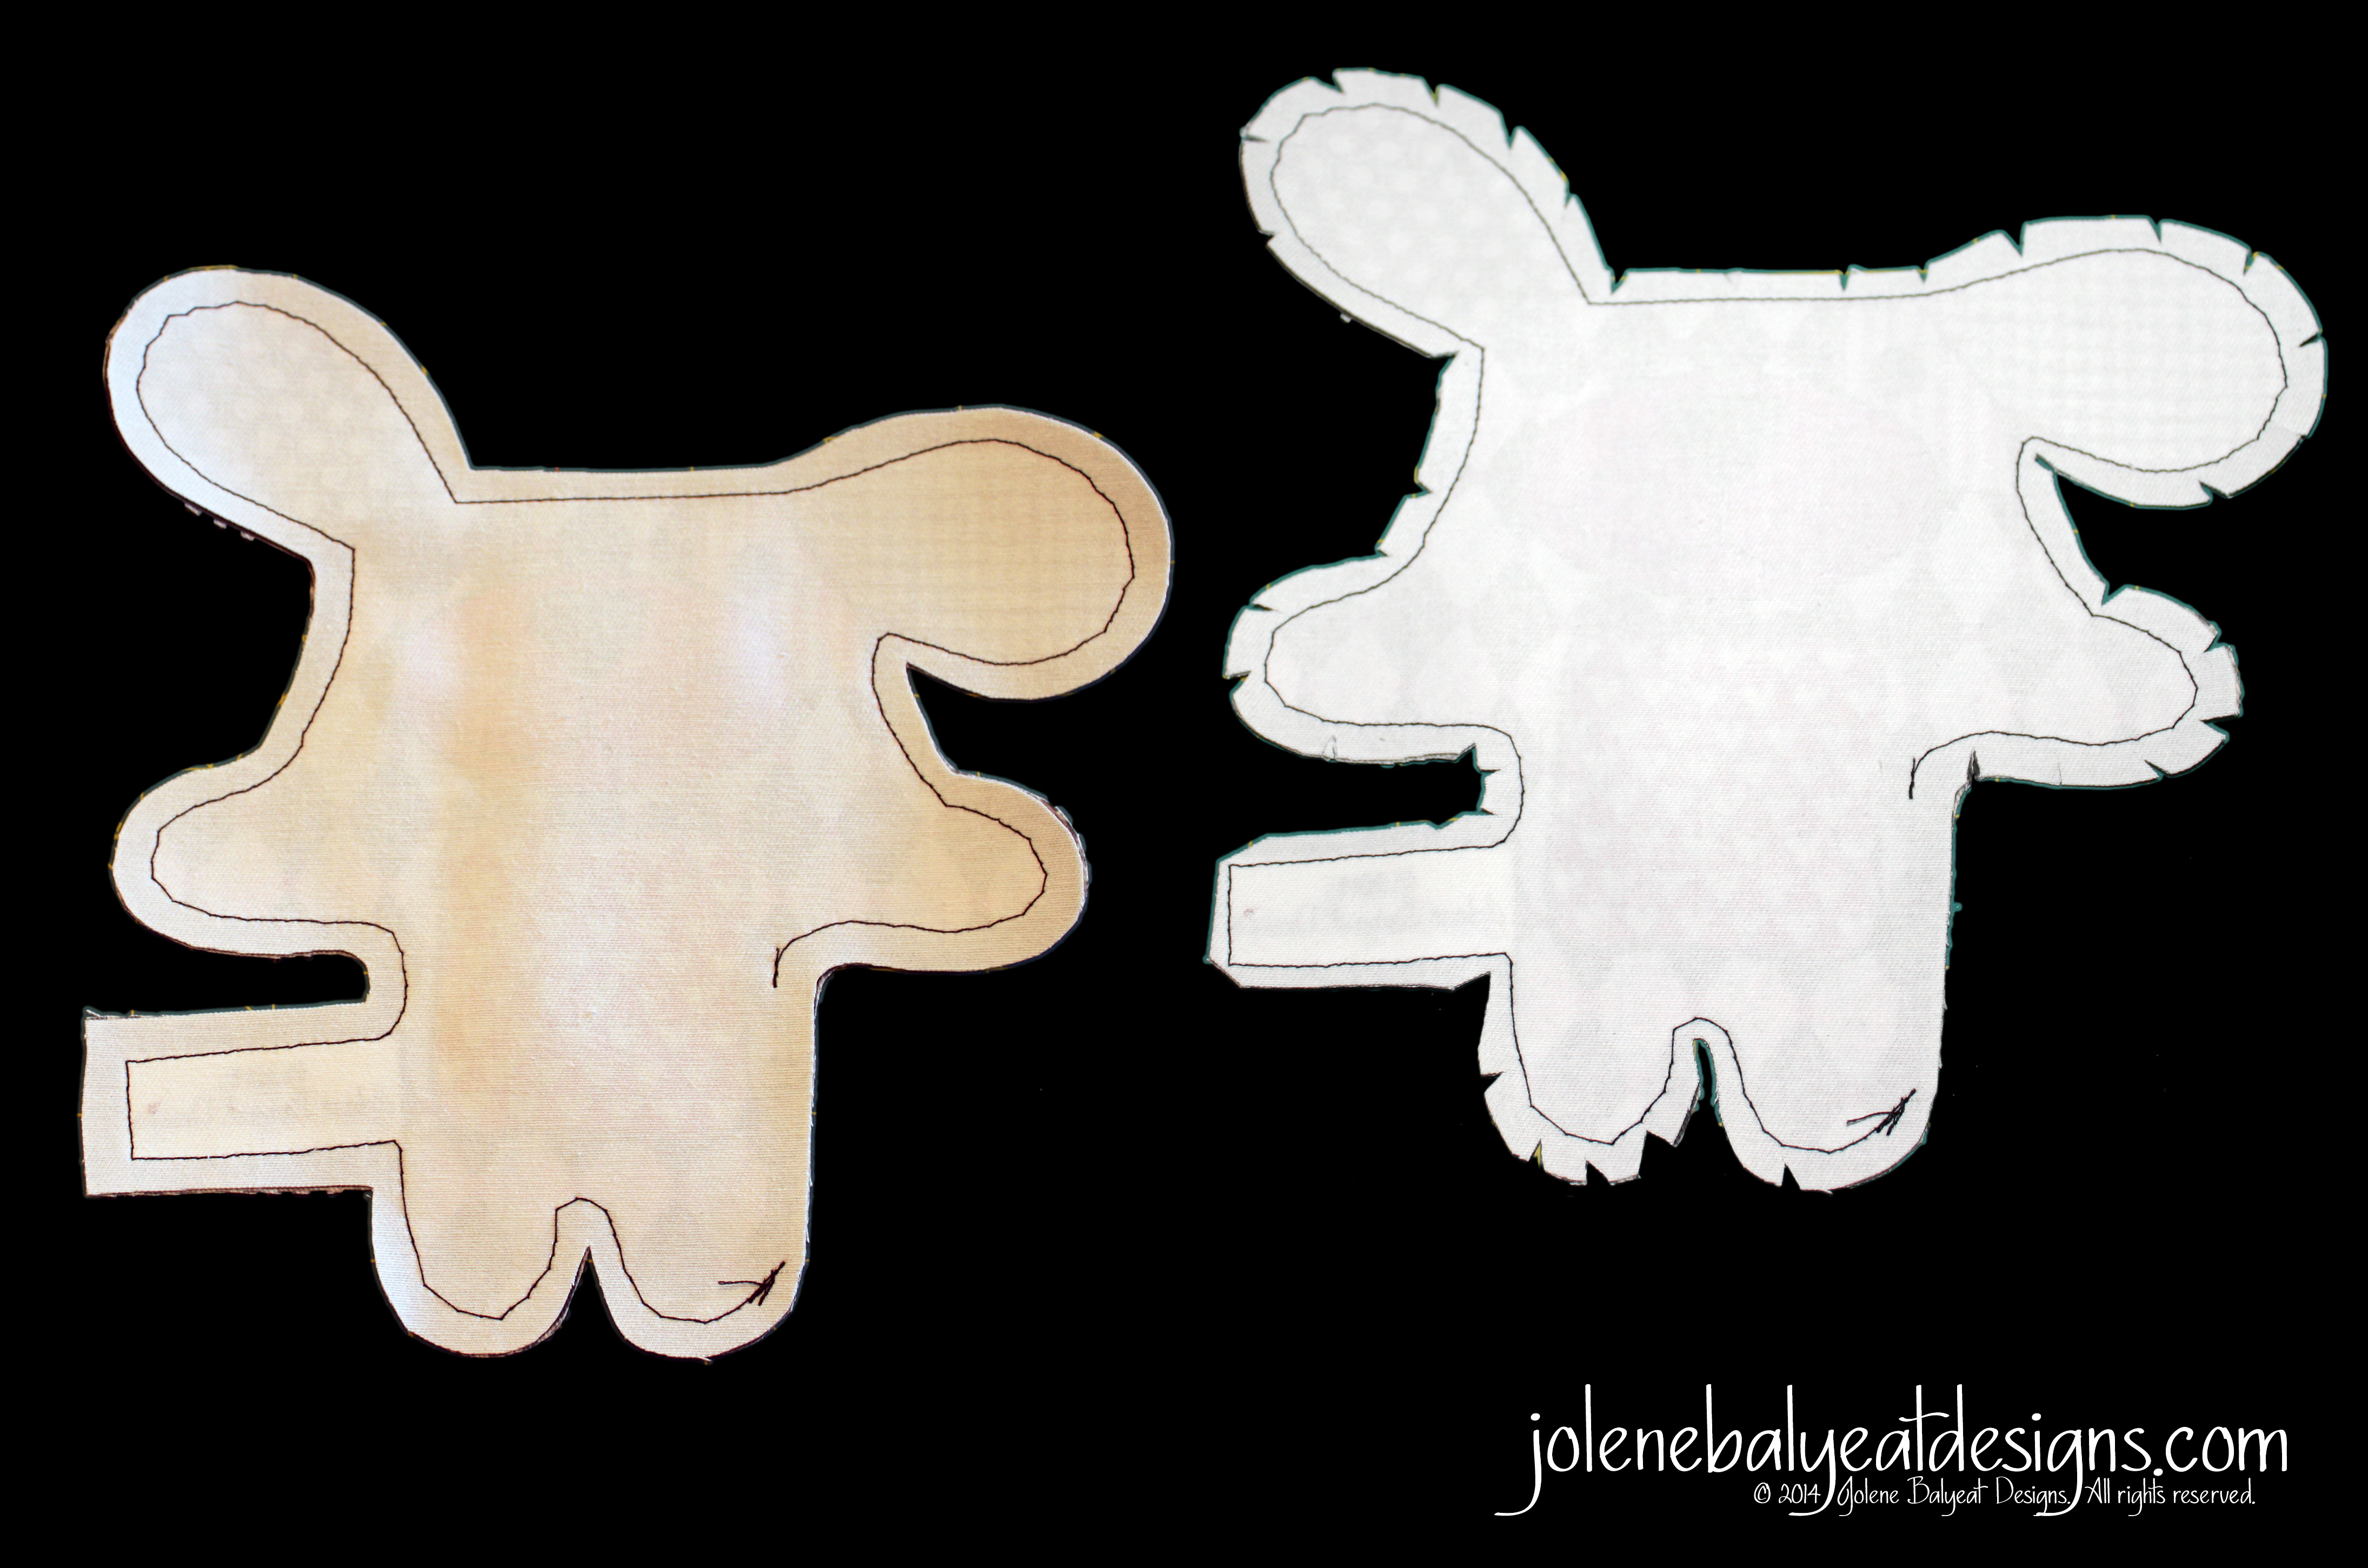
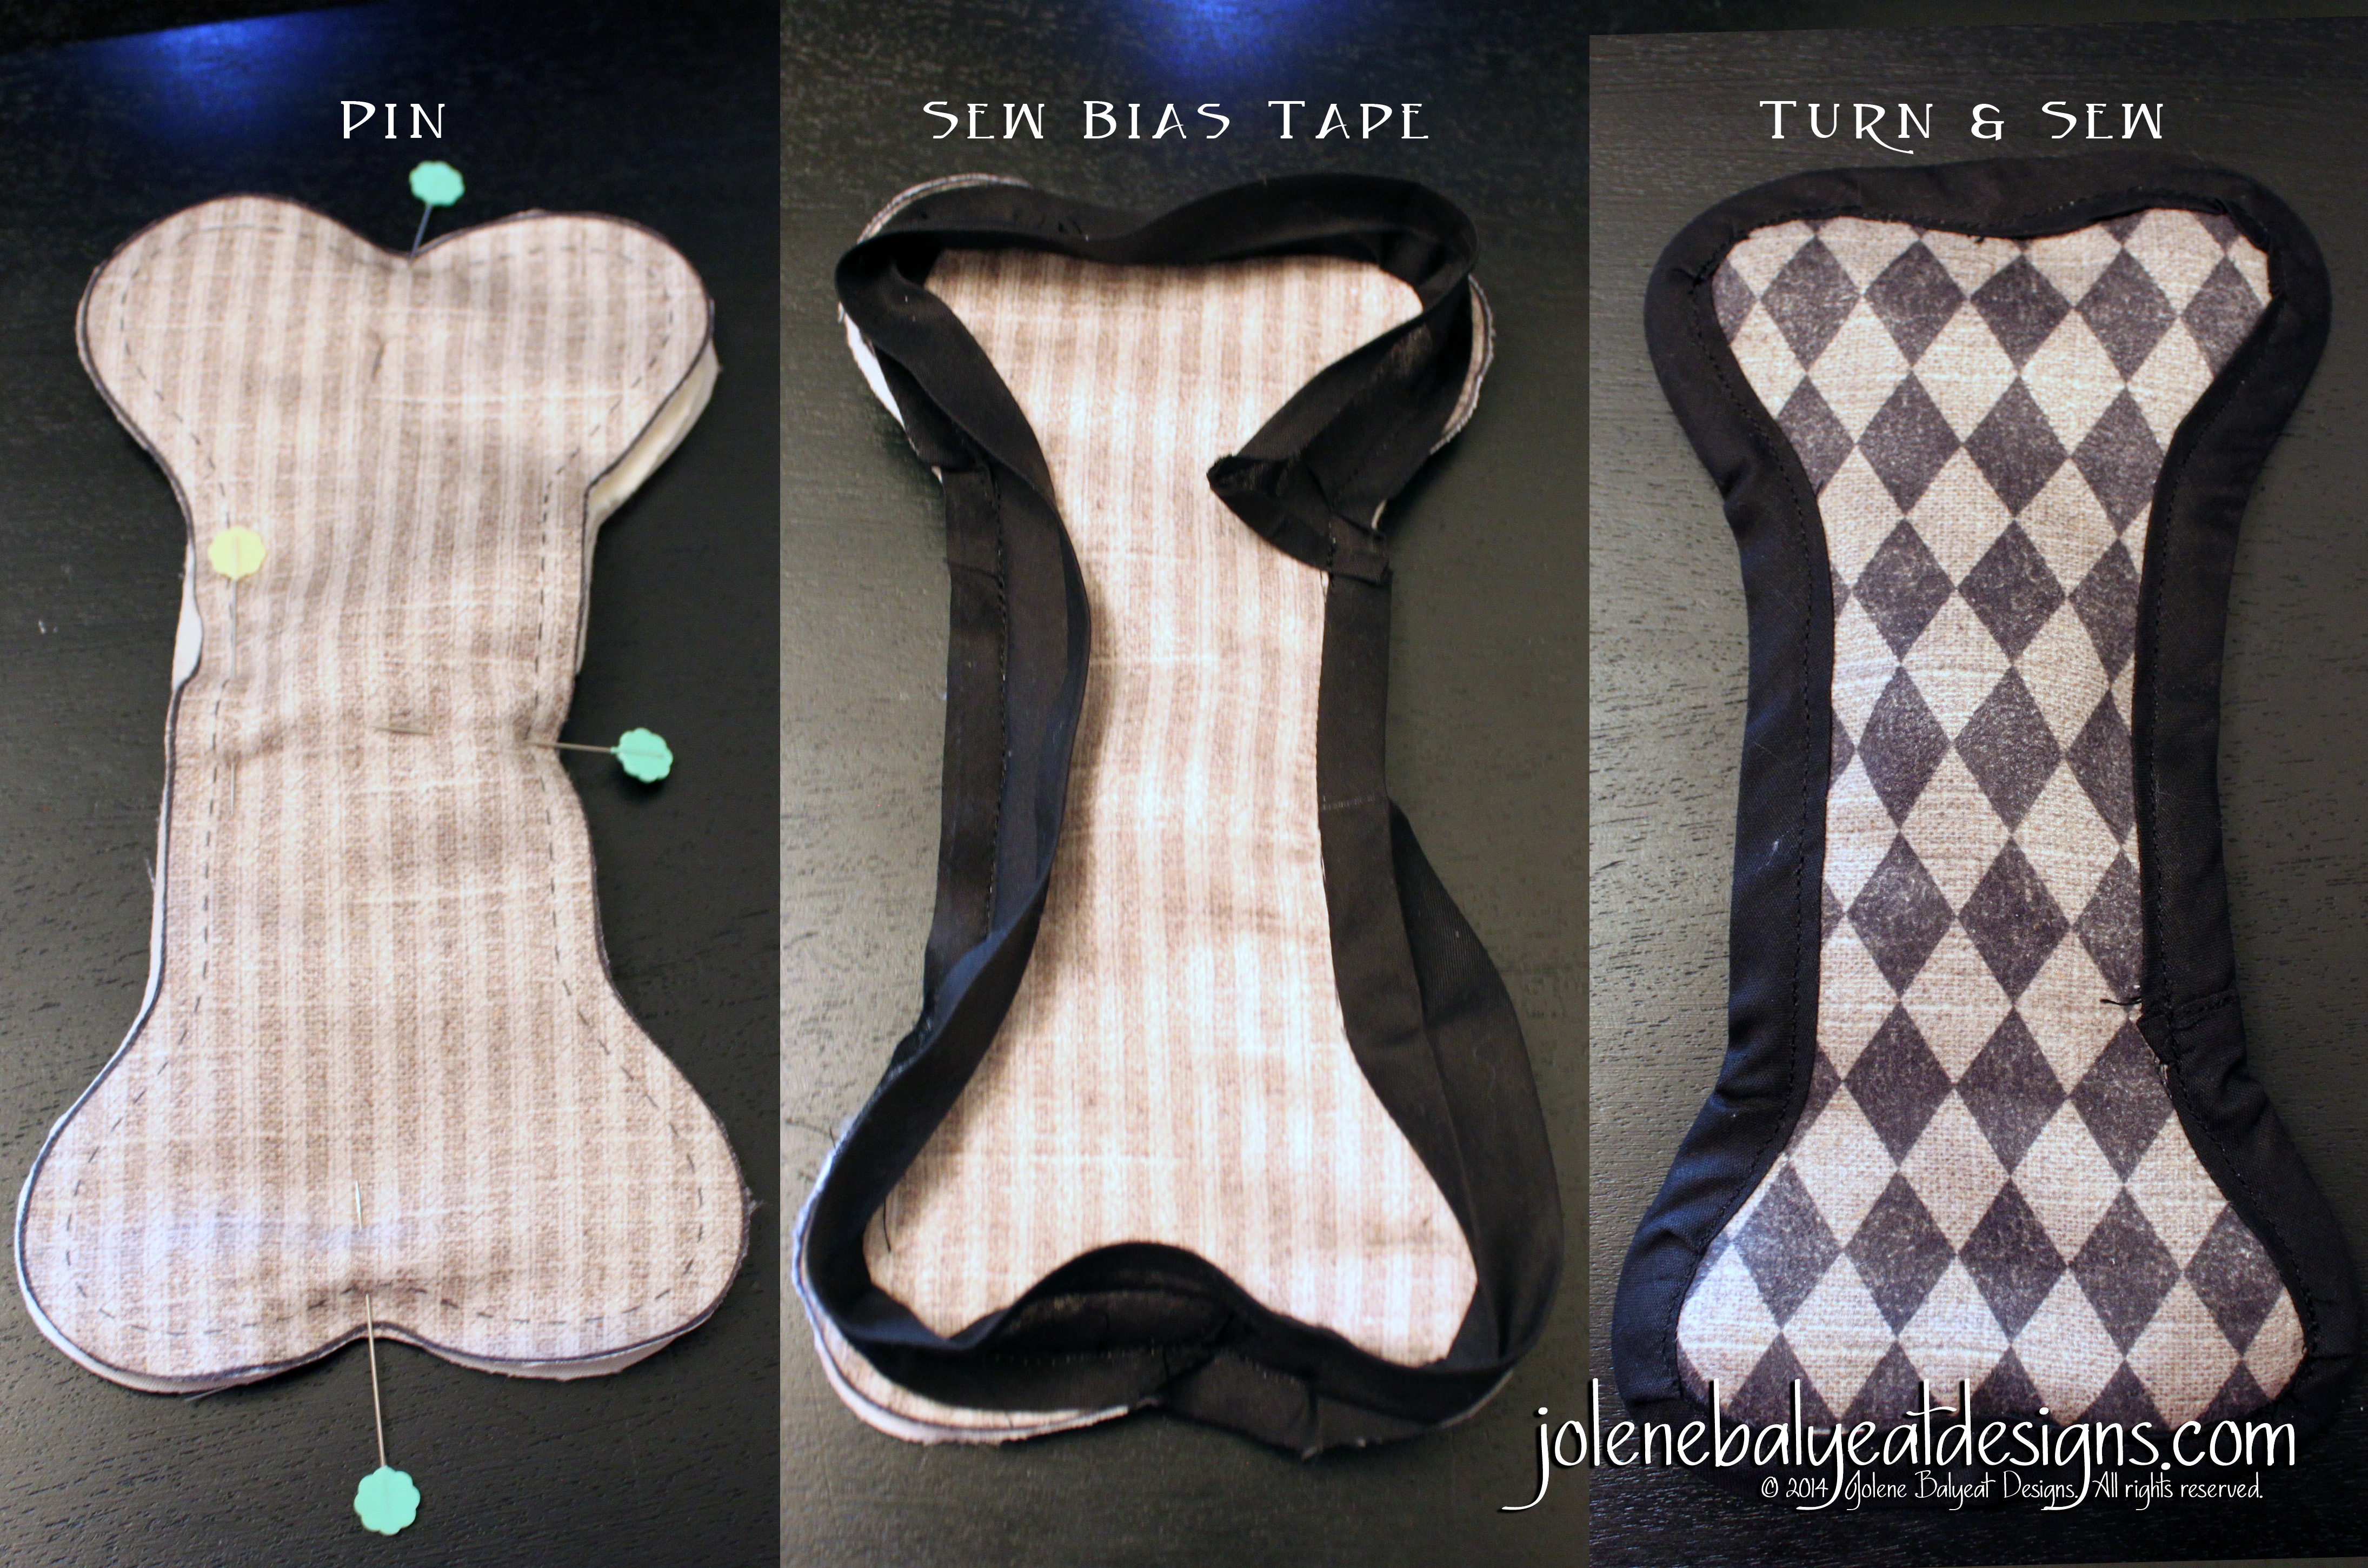
First, cut out the designs along the outer lines, then chose desired method to assemble.
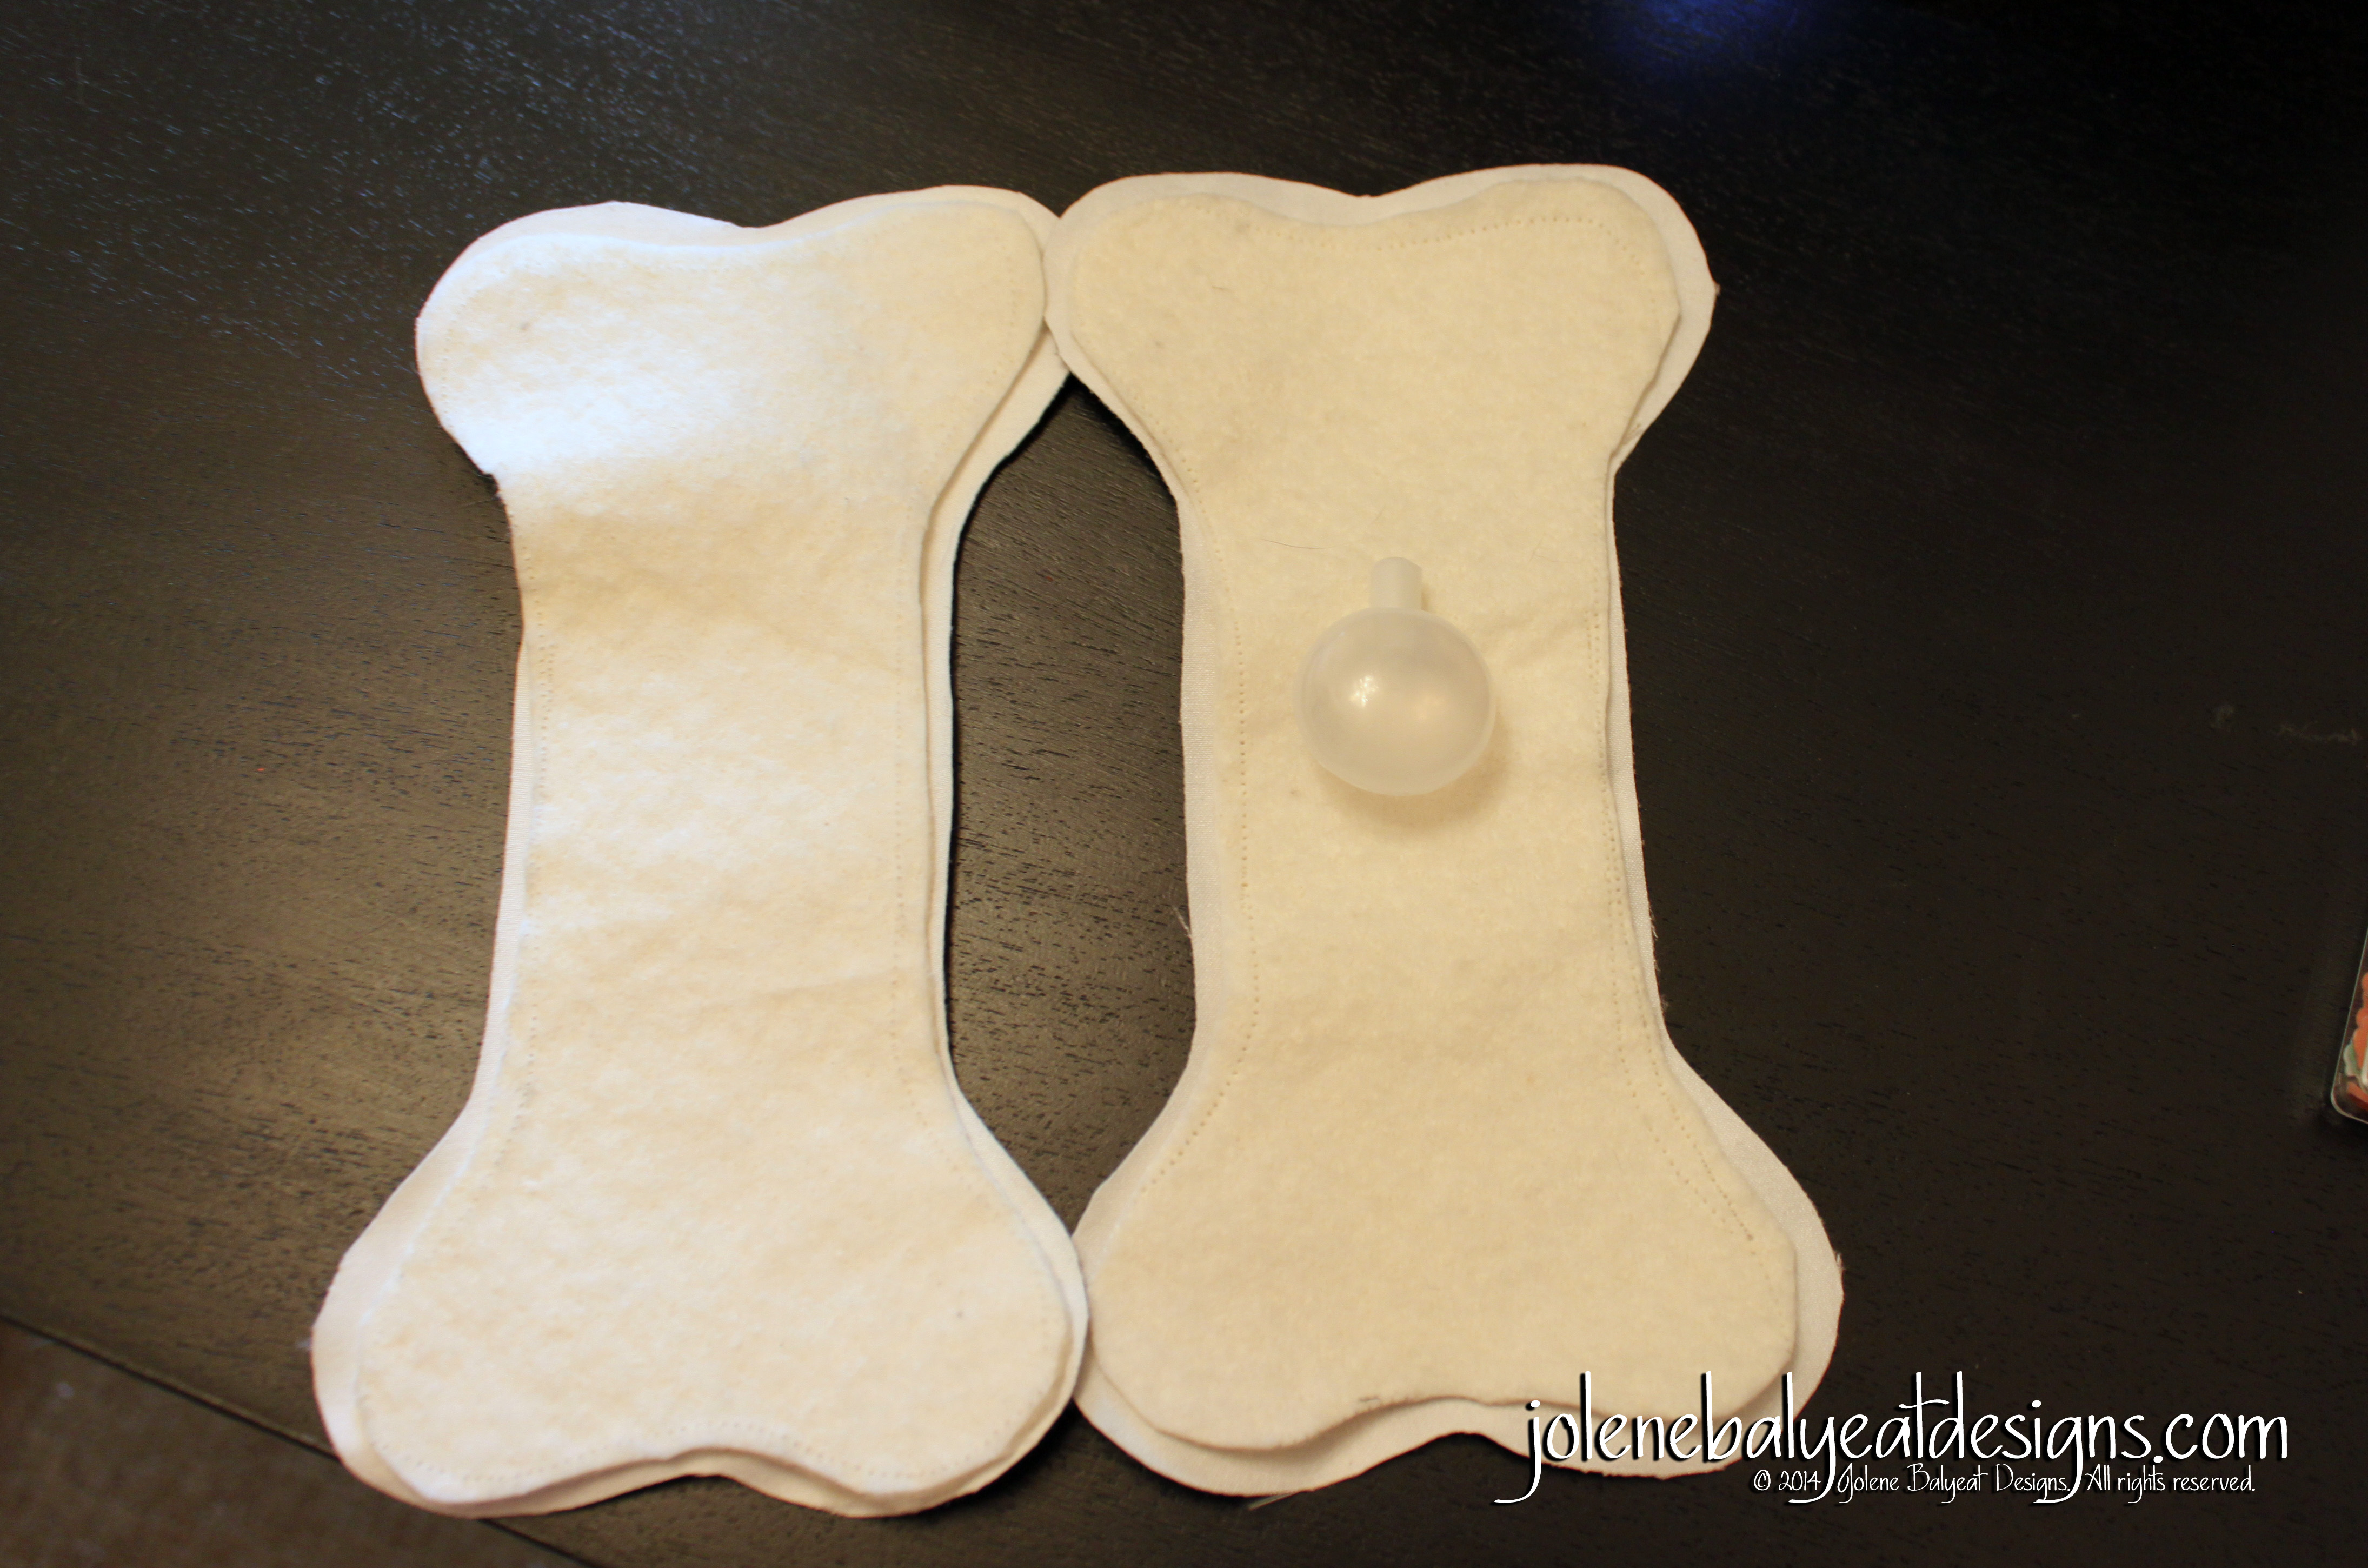
Method A:
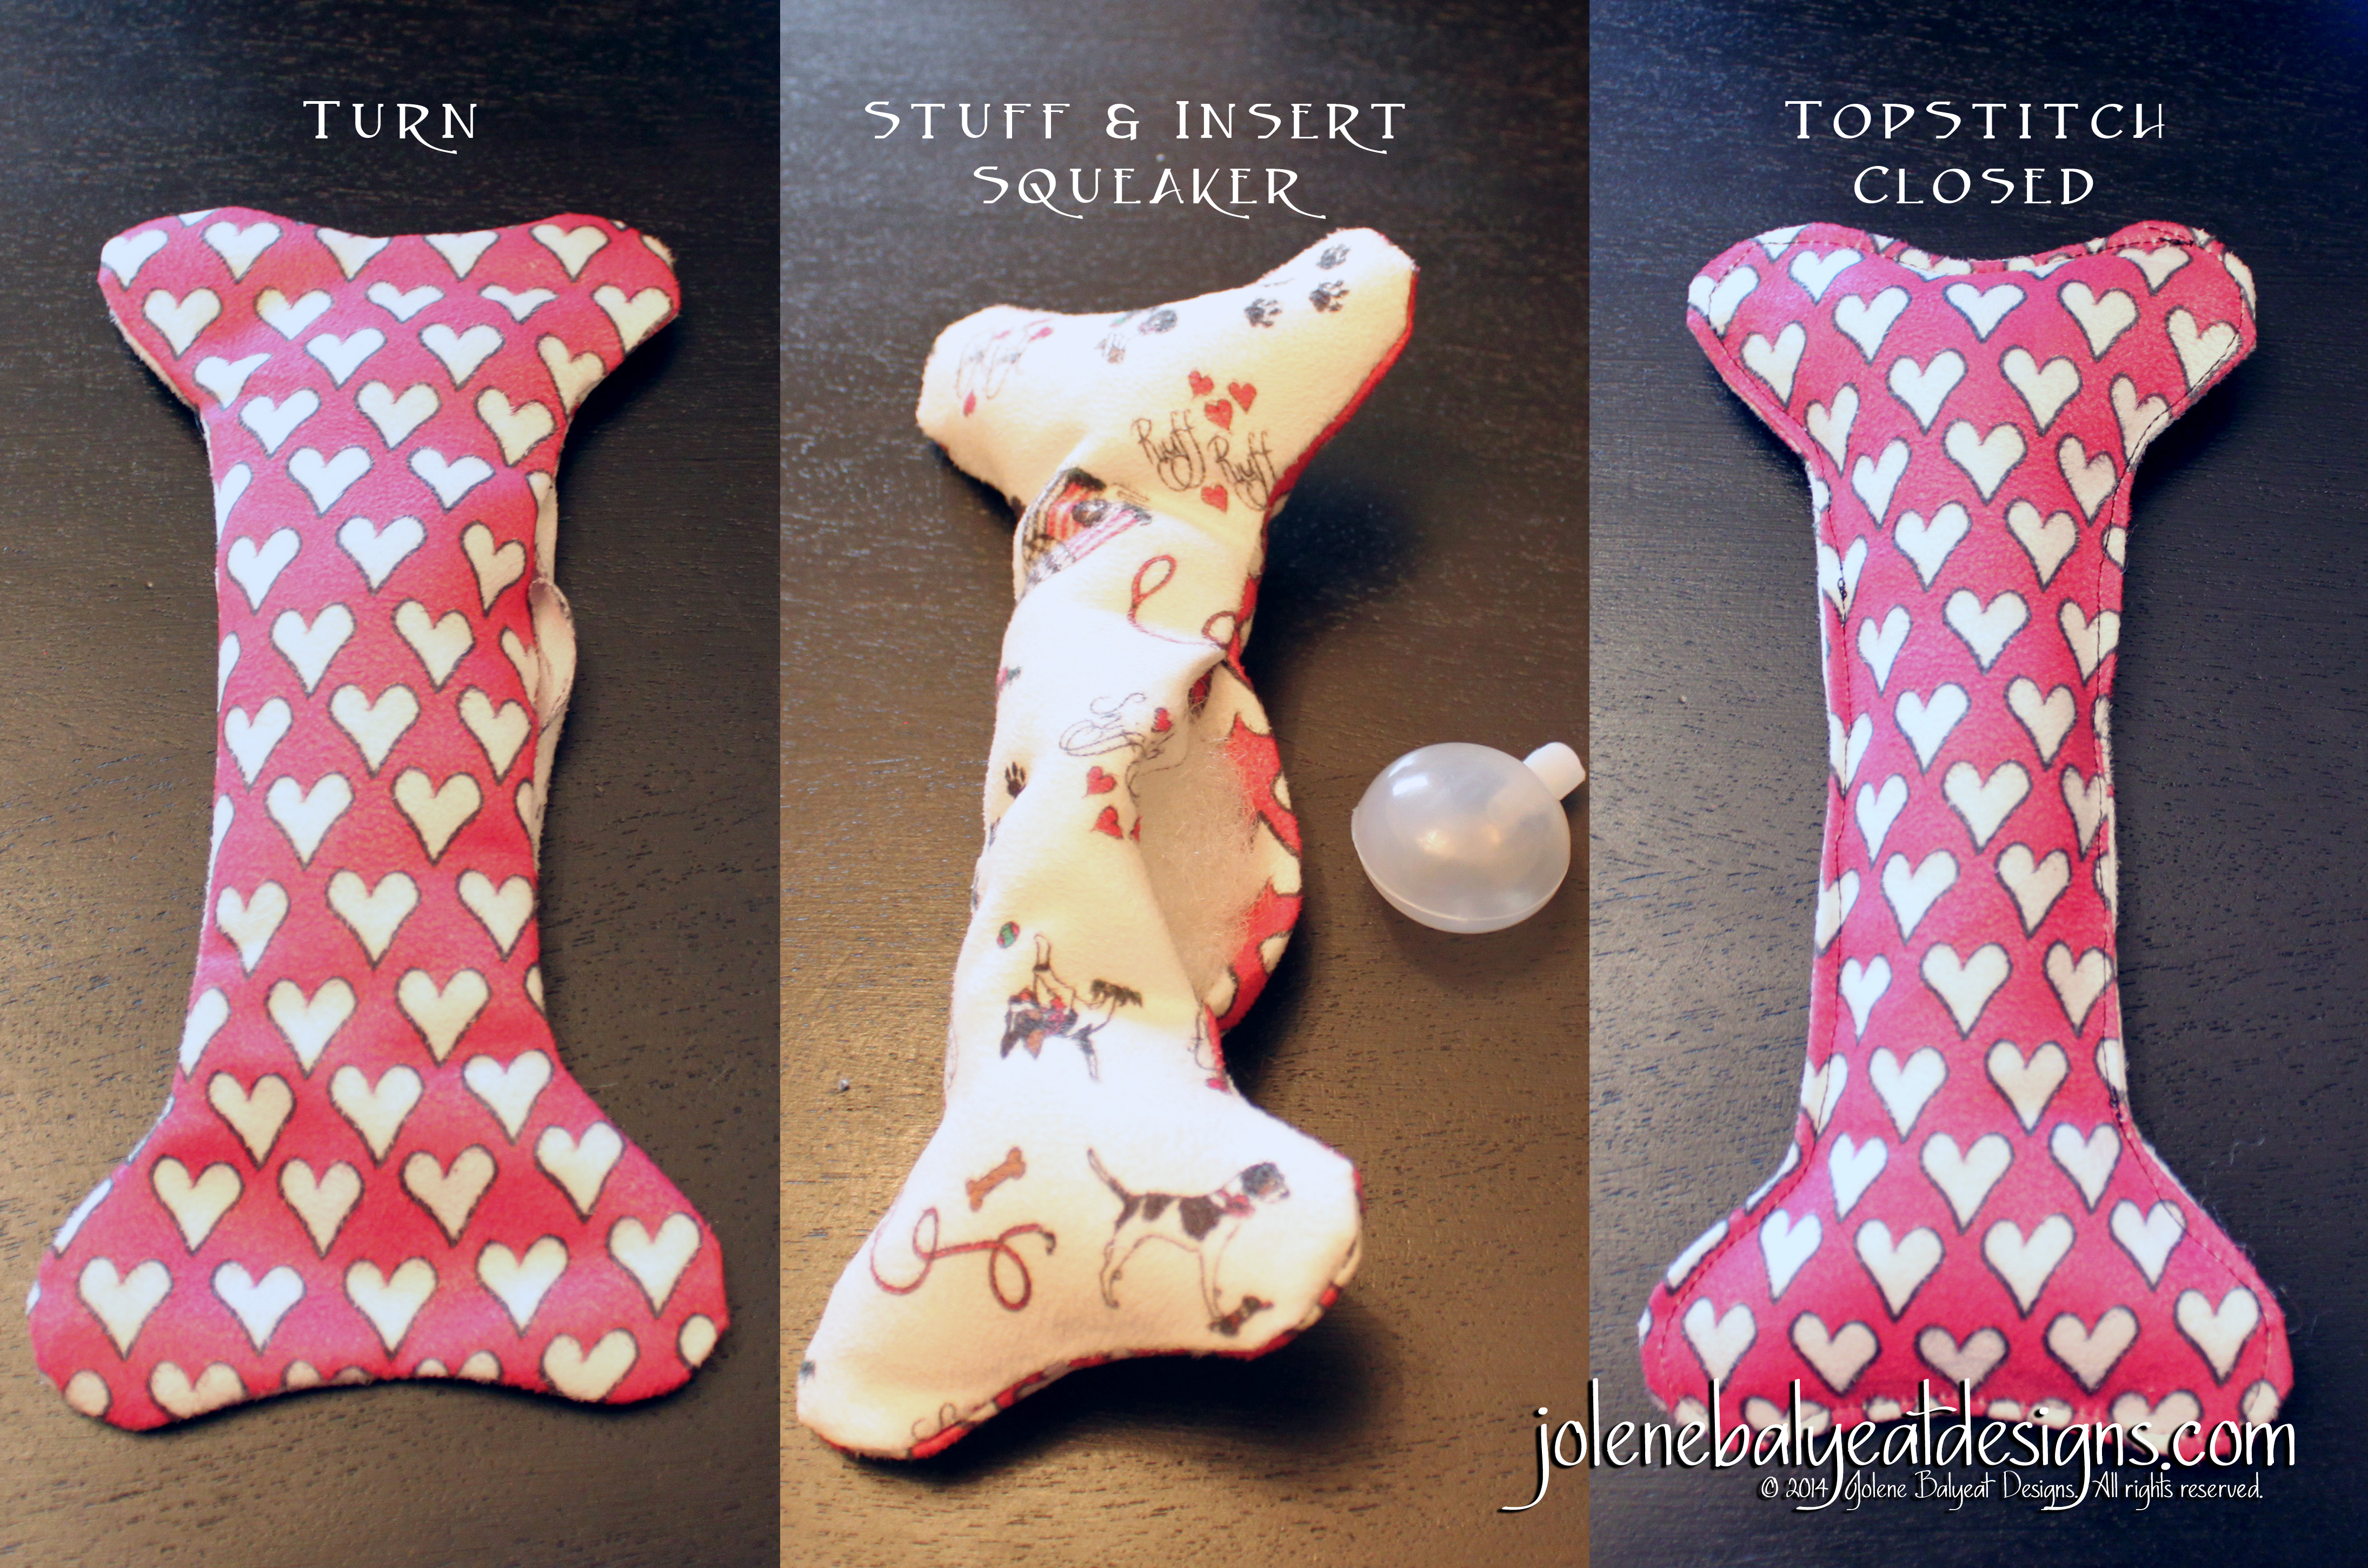
1. Sew right sides together leaving an opening to turn

2. Clip corners. When doing the kitty or puppy shapes, clip and trim the seams a bit to make turning easier.
3. Turn right sides out, insert stuffing and squeaker, and then topstitch closed
Method B:
(NOTE: This is NOT my favorite method. I tried it for the dogs I know that must kill stuffing, and their owners therefore try to have minimal fluffing arround. It works for the bone shapes, but I wasn’t pleased with the results/lack of neatness of the bias application. And I even bought a special attachment for my sewing machine to try to assemble it all in one fell swoop. However, if your machine and/or sewing skills are exceptional, then this could be a viable option, so I included it just in case!)
1. Trim batting slightly smaller than the circumference of the bone shape.
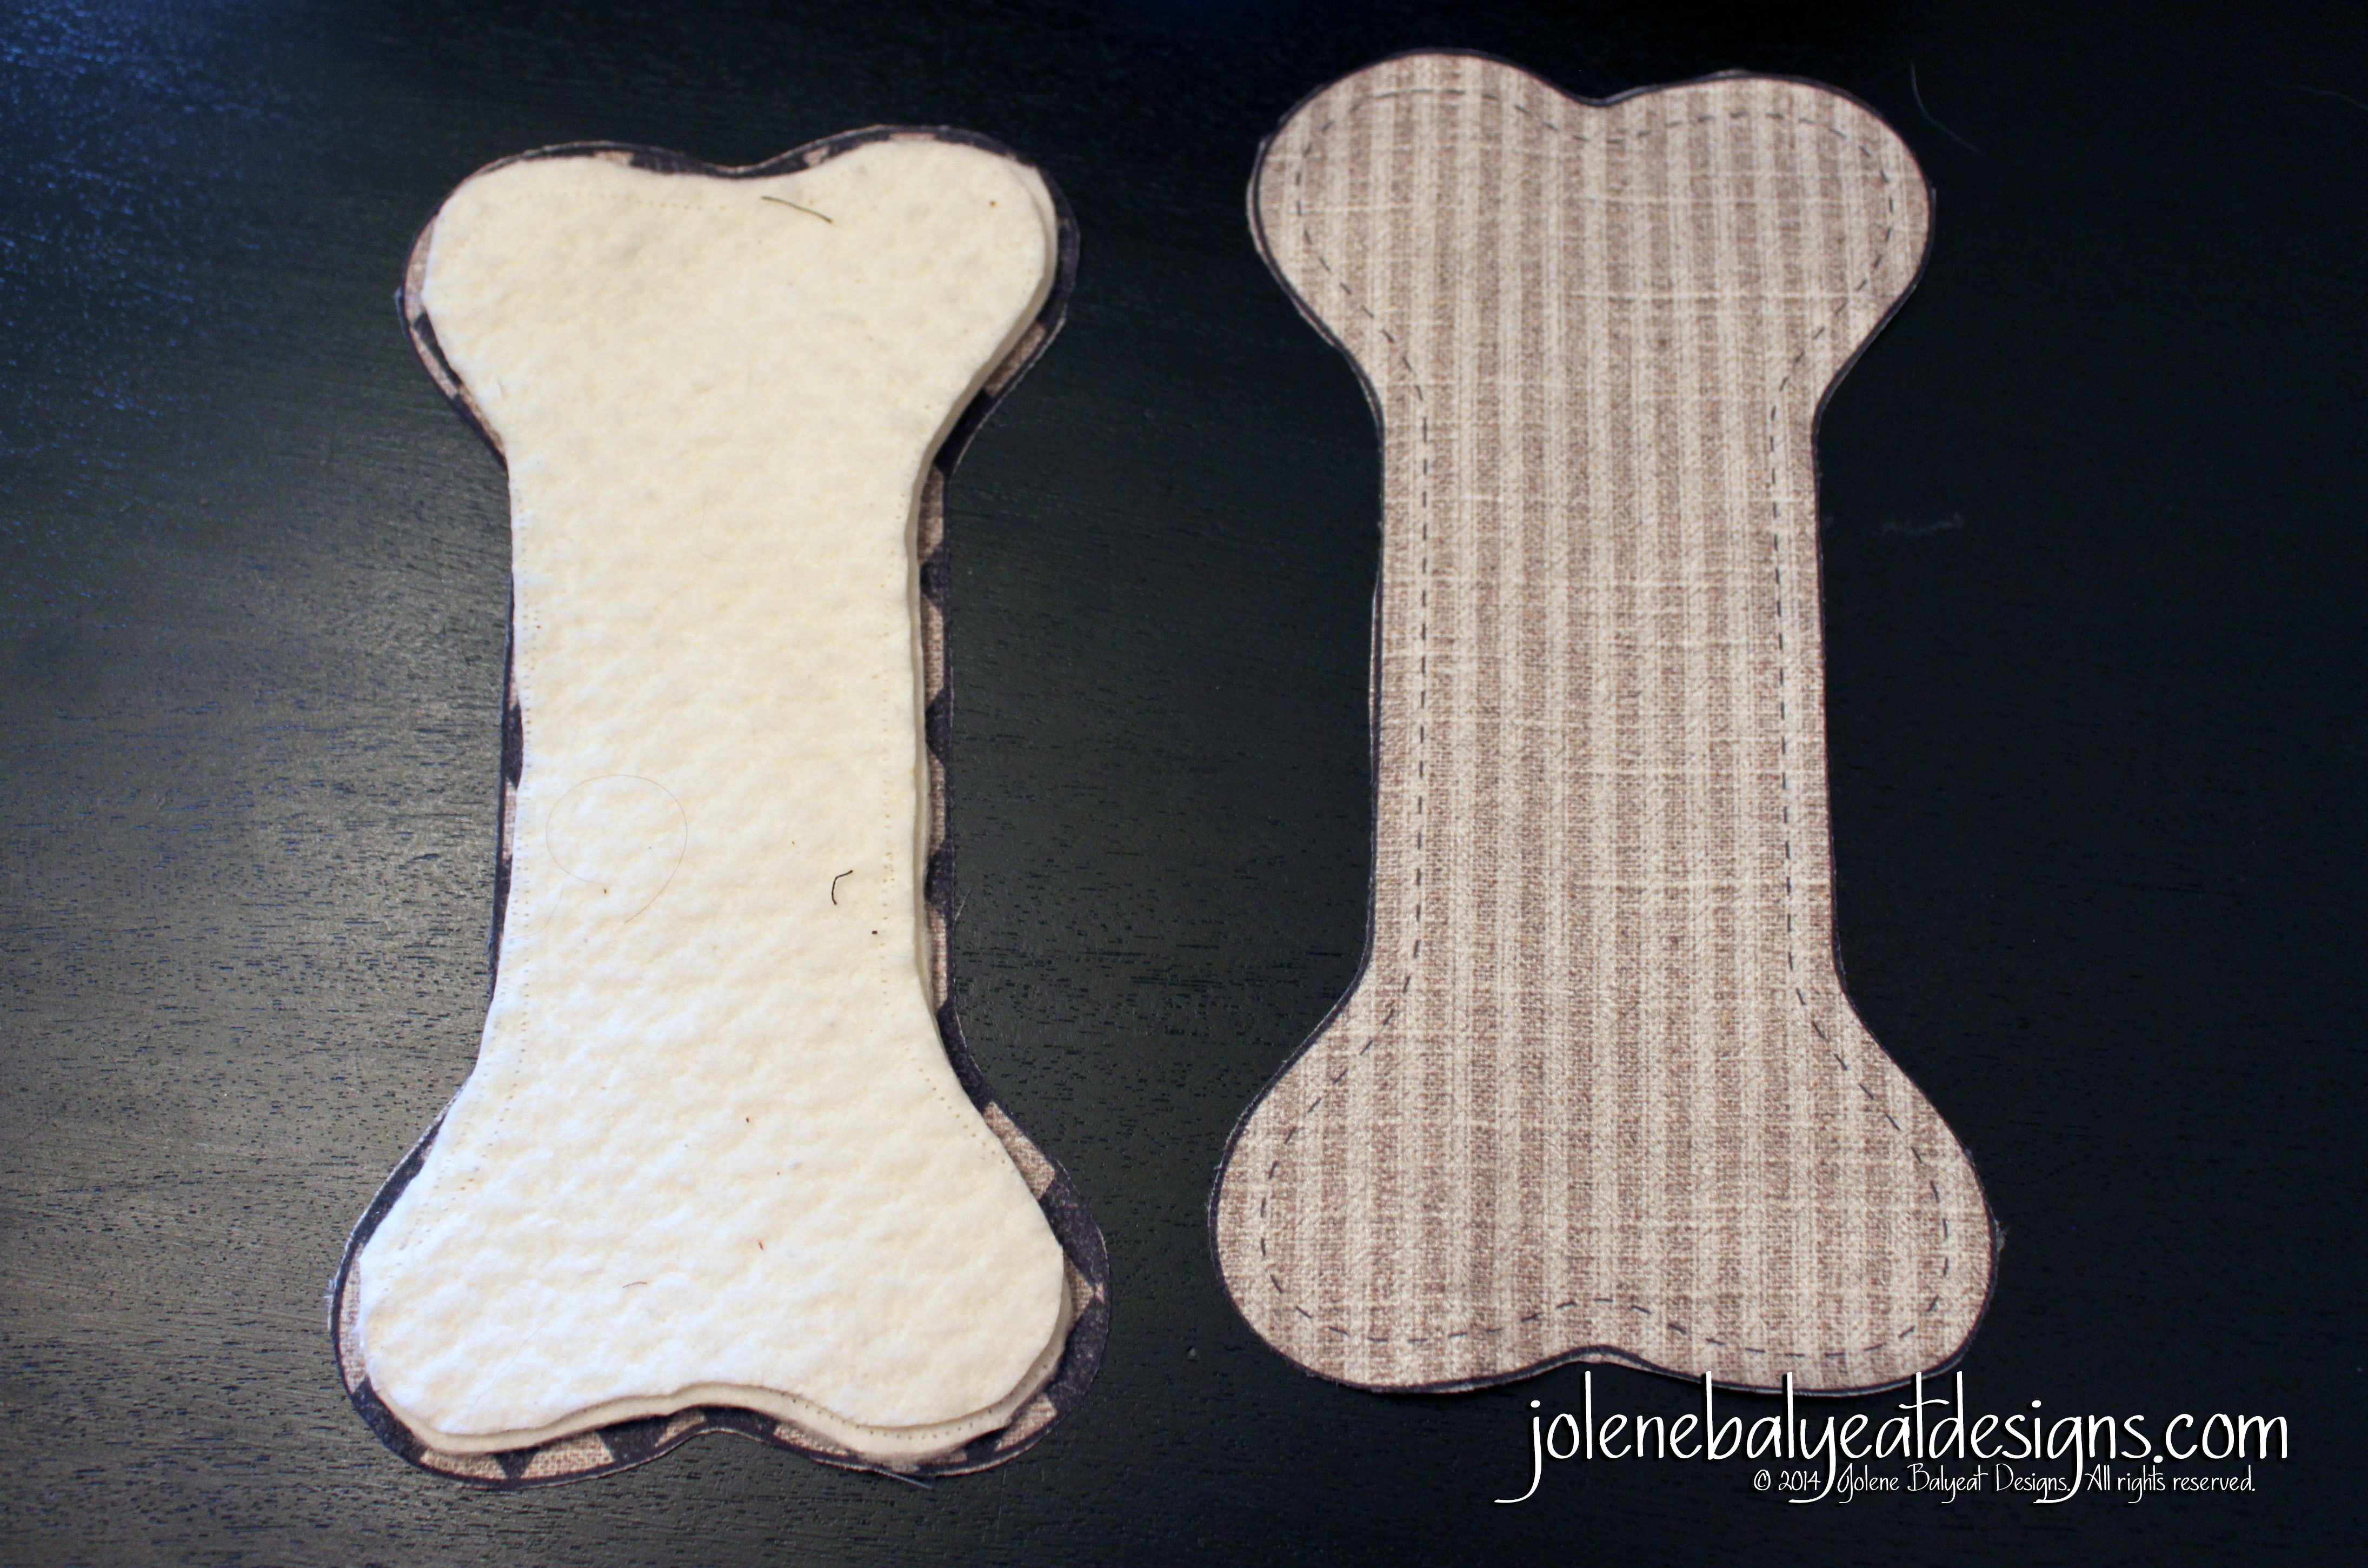
2. Sandwich squeaker between layers of batting with rights sides of design outward.
3. Pin and then staystich .25″ around edge and encase seam with 1/2 inch double fold bias tape.
Present to one lucky creature and watch them joyfully play!
Inspirational Scripture:
“The righteous care for the needs of their animals, but the kindest acts of the wicked are cruel.” Proverbs 12:10 (NIV)
